Frosted Christmas Brownies Recipe
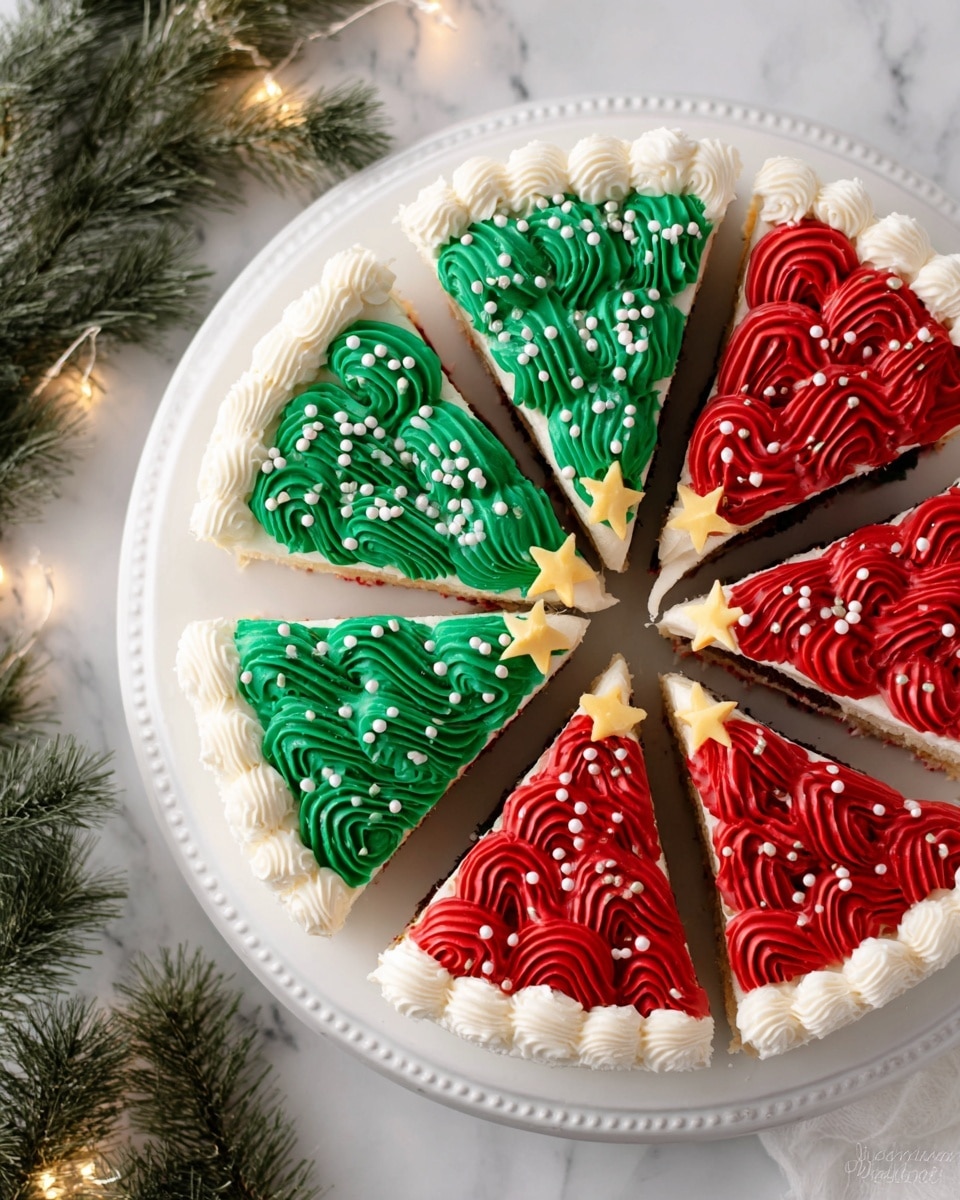
There’s something magical about a dessert that instantly screams festive, and that’s exactly what this Frosted Christmas Brownies Recipe does! Imagine rich, fudgy brownies buried under a thick, creamy layer of white frosting, then sprinkled with shiny gold stars and delicate pearls — it’s the kind of treat that makes holiday gatherings sparkle. I’ve made these many times during the holidays, and each batch seems to bring more joy (and requests for seconds) than the last.
Whether you’re hosting a big Christmas party or just want a cozy dessert to share with your family by the fire, these frosted brownies are perfect. They’re surprisingly easy to make, too — you can use a boxed mix for convenience or whip up my homemade brownie base if you feel adventurous. Either way, the frosting and decorations turn a simple brownie into a real centerpiece, and that’s what makes this Frosted Christmas Brownies Recipe totally worth trying.
Ingredients You’ll Need
All the ingredients blend together to create that perfect balance of fudgy texture, creamy sweetness, and festive fun. I always recommend fresh, quality ingredients because they shine through, especially in simple treats like these.
- Brownie Mix or Homemade Brownie Ingredients: You can save time with a boxed mix or control flavor and texture by making brownies from scratch.
- White Frosting: Choose a creamy, spreadable frosting that holds its shape well for decorating.
- Edible Gel Food Coloring: I prefer gel because it doesn’t thin the frosting, giving you vibrant colors with less mess.
- Edible Gold Stars: These add that perfect shimmer and festive look that guests will love.
- White Pearl Sprinkles: They bring texture and elegance to your frosted brownies without overpowering the look.
- Icing Bags and Frosting Tips: These tools give you control to swirl and pipe frosting beautifully like a pro.
Variations
I love mixing things up depending on my mood or the occasion. These Frosted Christmas Brownies Recipe variations keep things fresh and fun — and trust me, your friends and family won’t mind one bit if you add your own twist!
- Nutty Twist: Adding chopped walnuts or pecans to the brownie batter gives a lovely crunch I adore, especially around Christmas.
- Chocolate Peppermint Frosting: I once swapped plain white frosting for peppermint-flavored to bring in a festive coolness. It was a huge hit!
- Gluten-Free Version: Use a gluten-free brownie mix or recipe — the frosting and decorations work just as well for everyone to enjoy.
- Dairy-Free Adaptation: Substitute your frosting for a dairy-free version and pick plant-based brownie ingredients to keep it allergy-friendly.
How to Make Frosted Christmas Brownies Recipe
Step 1: Bake those brownies to fudgy perfection
Start by preparing your brownie batter—either by following box instructions or your favorite homemade recipe. My advice? Don’t overbake! The goal is a fudgy center, so keep a close eye on the timer, and use that toothpick test (you want it to come out with a few moist crumbs, not completely clean). Let the brownies cool completely before the frosting stage; frosting warm brownies is a recipe for a melty mess.
Step 2: Color and prepare your frosting
While the brownies cool, divide your white frosting into separate bowls if you want to create multiple colors using your edible gel food coloring. Add just a tiny bit of gel at a time because it’s super concentrated. Mix well until you reach your desired festive hues — I usually go for classic Christmas red and green with some white left plain. It’s way more fun than just one color!
Step 3: Frost with style
Transfer your colored frosting to icing bags fitted with frosting tips — I like a star tip for pretty swirls. Pipe generous swirls, rosettes, or whatever pattern feels right. Don’t stress about perfection — a bit of rustic charm makes them even cozier and more inviting.
Step 4: Add your festive touches
Now, sprinkle on those edible gold stars and white pearl sprinkles. They instantly take your frosted brownies from delicious to dazzling. If you’re making these with kids, let them help decorate — it’s a fun tradition I treasure.