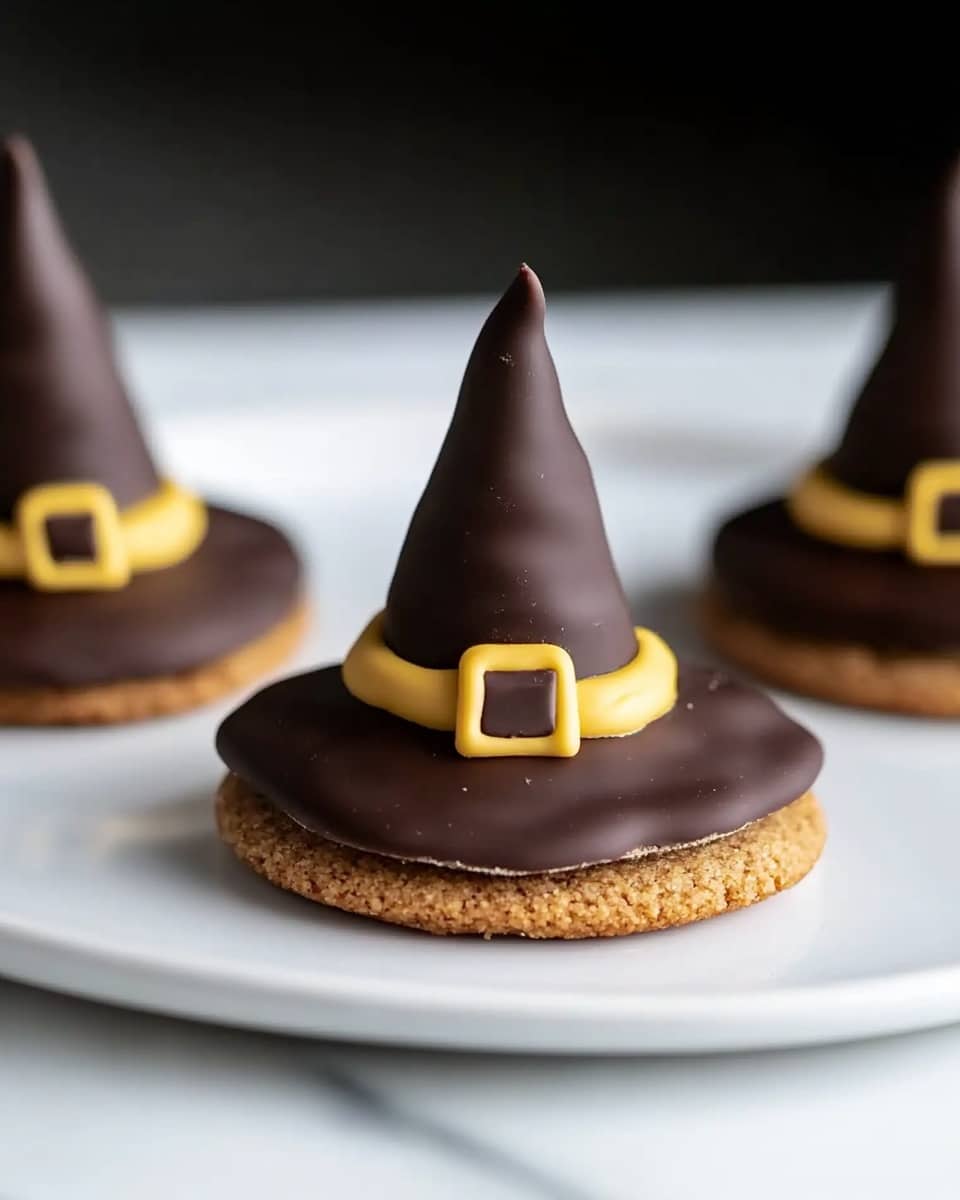
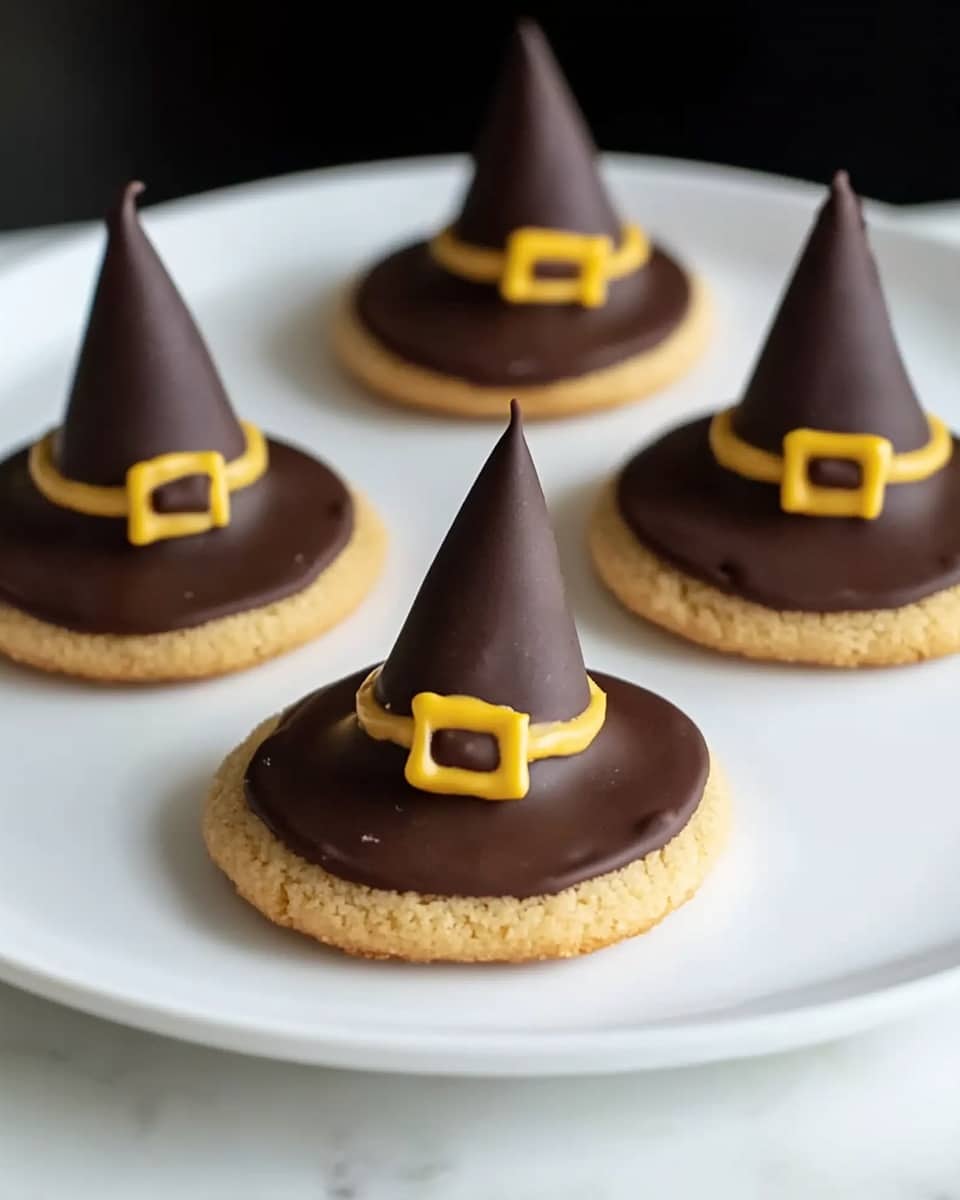
Witches’ Hats Cookies Recipe
If you’re on the hunt for a festive and fun treat that brings a little magic to your cookie lineup, this Witches’ Hats Cookies Recipe is just what you need. I discovered these cheeky little delights a few Halloweens ago, and they’ve been a go-to ever since. They’re quick to put together but look incredible — perfect for parties or when you want to surprise your family with a creative snack that tastes as good as it looks.
What makes this Witches’ Hats Cookies Recipe a winner for me is how simple the assembly is — no baking required! This means you can whip up a batch in under half an hour, letting you spend more time enjoying your spooky celebrations and less time in the kitchen. Plus, these cookies have a perfect mix of crunchy, melty, and sweet, which always earns rave reviews from kids and adults alike.
Ingredients You’ll Need
All the ingredients for this recipe come together like a little Halloween dream team, each adding just the right texture and flavor. Keep an eye out for the fudge stripe cookies because they’re the star of the show, providing that signature stripe that hints at the chocolate kiss topping.
- Fudge stripe cookies: These cookies have chocolate stripes right on them, adding a double chocolate delight and a fun striped pattern that looks great as a base.
- Honey: Just a bit helps the chocolate kisses stick, and I love how it adds a hint of natural sweetness that keeps everything together without overpowering.
- Milk chocolate candy kisses: These are perfect for the “hat” top. I usually find the classic Hershey’s Kisses work best here, but feel free to get creative with flavored ones too!
- Decorating gel: This lets you add a personal touch to your witches’ hats — I use orange or green colors to keep things festive and fun.
Variations
I love playing around with this recipe — it’s one of those simple projects where little tweaks can make it your own. Whether you’re catering to a specific taste or just feeling creative, there’s lots of room to experiment with the essentials.
- Spiced Witches’ Hats: Adding a sprinkle of cinnamon or pumpkin pie spice to the honey before assembly brings a cozy fall twist that I tried last year. It’s subtle but surprisingly charming.
- Dairy-Free Version: Use dairy-free chocolate kisses and substitute honey with maple syrup. I’ve done this for friends with allergies and the result was still impressively tasty!
- Colorful Decorating Gel: Swap in bright neon gels or edible glitter pens for decorating to make these cookies pop at kids’ parties — they love helping with the decorating too!
How to Make Witches’ Hats Cookies Recipe
Step 1: Prep Your Workspace and Ingredients
Before diving in, line a baking sheet with parchment paper. This helps keep the cookies from sticking and makes cleanup a breeze. Have all your ingredients close at hand — unwrapping those candy kisses takes a bit of time, so I like to get that out of the way first!
Step 2: Brush the Cookie with Honey
Lightly brush the flat, striped side of each fudge stripe cookie with honey. This sticky layer is what makes the chocolate kiss “stick” without sliding off. Be gentle — you want just enough honey to hold the kiss without making the cookies soggy.
Step 3: Place the Chocolate Kiss
Immediately set one unwrapped milk chocolate candy kiss on top of the honey-coated side of each cookie. The peak of the kiss should point upwards, forming the tip of your witch’s hat.
Step 4: Add Your Decorating Gel Details
Now comes the fun part — decorating! Use the decorating gel to add any details you want on the hats: little buckles, dots, or squiggly lines all work great. Try not to overthink it — they look adorable even with a simple dot!
How to Serve Witches’ Hats Cookies Recipe
Garnishes
I usually adorn the serving plate with a few sprigs of fresh rosemary, which look eerily like tiny pine trees or witchy herbs and add a lovely aroma. You can also sprinkle edible glitter on the hats if you want to give them a sparkling magical effect — my kids love that extra touch!
Side Dishes
These cookies pair beautifully with a warm cup of spiced cider or hot chocolate. When I served them at a recent party, I placed some pumpkin bread and caramel apple slices nearby, and the combo was a total hit.
Creative Ways to Present
For Halloween parties, I like to display the Witches’ Hats Cookies Recipe on a tiered serving stand with fake spider webs and little plastic spiders for a spooky effect. Another fun trick is arranging them in the shape of a witch’s broomstick — it always gets compliments and makes for a memorable centerpiece.
Make Ahead and Storage
Storing Leftovers
If you have leftovers (which might be rare!), store these cookies in an airtight container at room temperature. I’ve found this keeps them fresh and crispy for about 3-4 days. Just keep them away from heat so the chocolate kisses don’t melt and lose their shape.
Freezing
I’ve tried freezing the assembled witches’ hats cookies, but honestly, the chocolate kisses sometimes lose their perfect texture once thawed. Instead, I freeze the fudge stripe cookies and assemble the hats fresh — this way, your treat is always perfectly crisp and charming.
Reheating
Since these cookies don’t technically need reheating, I usually just bring them to room temperature if I stored leftovers in the fridge. If the chocolate looks a little dull, a quick 10-second blast in the microwave works wonders to bring back that shiny allure.
FAQs
-
Can I use different types of cookies for the Witches’ Hats Cookies Recipe?
Absolutely! While fudge stripe cookies are traditional and give that nostalgic stripe pattern, you can swap them for any sturdy, flat cookie that holds its shape well. Sugar cookies or shortbread work nicely too. Just make sure the cookie isn’t too crumbly or overly soft to support the chocolate kiss.
-
What’s the best way to keep the chocolate kisses from sliding off?
Using a little honey as an edible adhesive is key. Brush a thin layer on the cookie where you’ll place the chocolate kiss. If honey isn’t your thing, you could try a small dab of corn syrup or even peanut butter, depending on flavor preferences. Just avoid anything too runny that will make the cookie soggy.
-
Can kids help make the Witches’ Hats Cookies Recipe?
Definitely! This recipe is one of my favorites to make with kids because it doesn’t require baking. They’ll have a blast unwrapping chocolate kisses and decorating the hats with gel. Just watch the honey step to avoid sticky fingers everywhere.
Final Thoughts
To me, the Witches’ Hats Cookies Recipe is more than just a cookie — it’s a little creative project that brings Halloween to life in the kitchen. Whether you’re making these with kids, hosting a party, or treating yourself to a whimsical snack, these hats never fail to bring smiles. I highly recommend giving them a try — you’ll love how easy and charming they are, and I’m pretty sure these cookies will become a new tradition in your spooky season celebrations!
Print
Witches’ Hats Cookies Recipe
- Prep Time: 15 minutes
- Cook Time: 0 minutes
- Total Time: 15 minutes
- Yield: Approximately 30 witches’ hats 1x
- Category: Dessert
- Method: No-Cook
- Cuisine: American
Description
Witches’ Hats are a fun and festive Halloween treat made by combining fudge stripe cookies with honey, milk chocolate candy kisses, and decorative gel to create adorable edible hats perfect for parties or themed gatherings.
Ingredients
Cookies
- 2 (16 ounce) packages fudge stripe cookies
Adhesive
- ¼ cup honey, or as needed
Chocolate
- 1 (9 ounce) bag milk chocolate candy kisses, unwrapped
Decoration
- 1 (4.5 ounce) tube decorating gel
Instructions
- Prepare the base: Lay out the fudge stripe cookies flat on a clean surface or serving tray to serve as the base of the witches’ hats.
- Apply the adhesive: Using a small spoon or brush, spread a small amount of honey on the flat side of each milk chocolate candy kiss to help it stick to the cookie.
- Assemble hats: Press each chocolate candy kiss onto the center of a fudge stripe cookie, creating the shape of a witch’s hat with the kiss as the pointed top.
- Add decoration: Using the decorating gel, pipe a band or simple designs around the base of each candy kiss to resemble a hatband and add creative flair.
- Set and serve: Allow the assembled witches’ hats to set so the honey adhesive firms up, then arrange them on a platter for serving at your Halloween celebration.
Notes
- Honey acts as a natural, edible adhesive, but you can substitute with peanut butter or frosting if preferred.
- Be sure to unwrap the candy kisses carefully to avoid damaging their shape.
- Decorating gel can be colored to add more festive and personalized designs.
- Store the finished witches’ hats in a cool, dry place to prevent melting of the chocolate kisses.
- This recipe does not require baking or cooking, making it quick and easy to prepare.
Keywords: Halloween treats, fudge stripe cookies, milk chocolate kisses, no-bake desserts, festive snacks, kids party food