Red Velvet Cheesecake Bliss Recipe
If you’re a fan of both red velvet cake and creamy cheesecake, this Red Velvet Cheesecake Bliss Recipe is like a dream come true. It’s that perfect blend of rich, velvety cake with a smooth, tangy cheesecake layer that comes together in one show-stopping dessert. Whenever I serve this at gatherings, it always gets that “wow” reaction — partly because it looks stunning and partly because it tastes divine.
What I love most about this Red Velvet Cheesecake Bliss Recipe is how versatile it is. Whether it’s a birthday, a holiday treat, or just a weekend indulgence, it fits perfectly into any occasion. Plus, it’s easier to make than you might think, especially with some simple tips I’ll share so you nail every step.
Ingredients You’ll Need
These ingredients work beautifully together to create the distinct red velvet flavor and the tangy richness of cheesecake. I find that quality cream cheese and fresh buttermilk really elevate the taste, so don’t skimp here!
- All-purpose flour: The base for our cake, gets the crumb structure just right.
- Granulated sugar: Sweetness is key, and it balances the tanginess of the cheesecake.
- Cocoa powder: This gives that subtle chocolate hint that defines red velvet.
- Baking powder & baking soda: Essential leaveners that help the cake rise and stay fluffy.
- Salt: Just a pinch to round out the flavors.
- Buttermilk: Adds moisture and a slight tang, which complements the cake’s flavors beautifully.
- Eggs: Provide structure and richness both in the cake and cheesecake layers.
- Vegetable oil: Keeps the cake tender and moist, much better than butter in this recipe.
- Red food coloring or beetroot powder: The signature pop of red – beetroot powder is great if you want a natural alternative.
- Vanilla extract: Brings depth and aroma to both cake and cheesecake.
- White vinegar: Reacts with the baking soda to help the cake rise and keeps it tender.
- Cream cheese: The star of the cheesecake layer, make sure it’s softened for smooth mixing.
- Sour cream: Adds creaminess and a little tang to the cheesecake.
- All-purpose flour (for cheesecake): Helps stabilize the cheesecake layer, so it holds its shape.
- Heavy cream: For the whipped topping, it makes everything feel light and indulgent.
- Powdered sugar: Sweetens the whipped cream gently without graininess.
- Fresh berries and red velvet cake crumbs (optional): Perfect for garnishing and adding texture/freshness when serving.
Variations
I like to mix things up depending on who I’m serving this to, and you might want to customize it to fit your taste or dietary needs. Feel free to experiment—this recipe is forgiving and fun to make your own!
- Gluten-Free Variation: I’ve swapped regular flour with a gluten-free blend before, and the texture still turned out great—just be sure your blend includes xanthan gum or a binder.
- Natural Red Color: If you’re avoiding artificial dyes, beetroot powder works wonderfully, though it’s a milder red and adds a subtle earthiness.
- Sugar-Free Option: Using a granulated sugar substitute that measures 1:1 like erythritol can reduce sweetness without losing texture, though a bit of trial and error might be needed.
- Vegan Adaptation: I haven’t tried this one myself yet, but creamy vegan cream cheese and flax eggs could be interesting to explore for a plant-based take.
- Chocolate Surprise: Mixing mini chocolate chips into the cheesecake layer is a personal favorite for an extra touch of indulgence.
How to Make Red Velvet Cheesecake Bliss Recipe
Step 1: Prepare the Red Velvet Cake Batter
Start by preheating your oven to 350°F (175°C) and greasing a 9-inch springform pan—trust me, the springform makes removing the cheesecake so much easier. In a mixing bowl, whisk together the flour, sugar, cocoa powder, baking powder, baking soda, and salt. In a separate bowl, mix buttermilk, egg, oil, red food coloring, vanilla, and white vinegar. Slowly add the wet ingredients to the dry and blend gently until the batter is smooth but not overmixed. Avoid overmixing to keep the cake tender!
Step 2: Make the Cheesecake Layer
While your cake batter rests, beat the softened cream cheese until creamy—this part is crucial to avoid lumps in your cheesecake layer. Add sour cream, sugar, eggs, vanilla, and flour, mixing until silky smooth. Be patient here; a well-mixed cheesecake batter guarantees that luscious texture.
Step 3: Assemble and Bake
Spread half of the red velvet cake batter evenly in your pan. Pour the cheesecake layer on top. Then dollop with the remaining cake batter—you can swirl gently with a butter knife if you like a marble effect. Pop it in the oven for about 55-65 minutes. The center should be mostly set but a little jiggle is okay—the cheesecake will firm up while cooling. Don’t open the oven early to avoid cracks!
Step 4: Chill and Prepare Whipped Cream Topping
Once baked, let your cheesecake cool to room temperature then refrigerate for at least 4 hours, ideally overnight. Before serving, whip the heavy cream with powdered sugar and vanilla until soft peaks form. Spread or pipe it generously on top for that extra creamy, cloud-like finish.
How to Serve Red Velvet Cheesecake Bliss Recipe
Garnishes
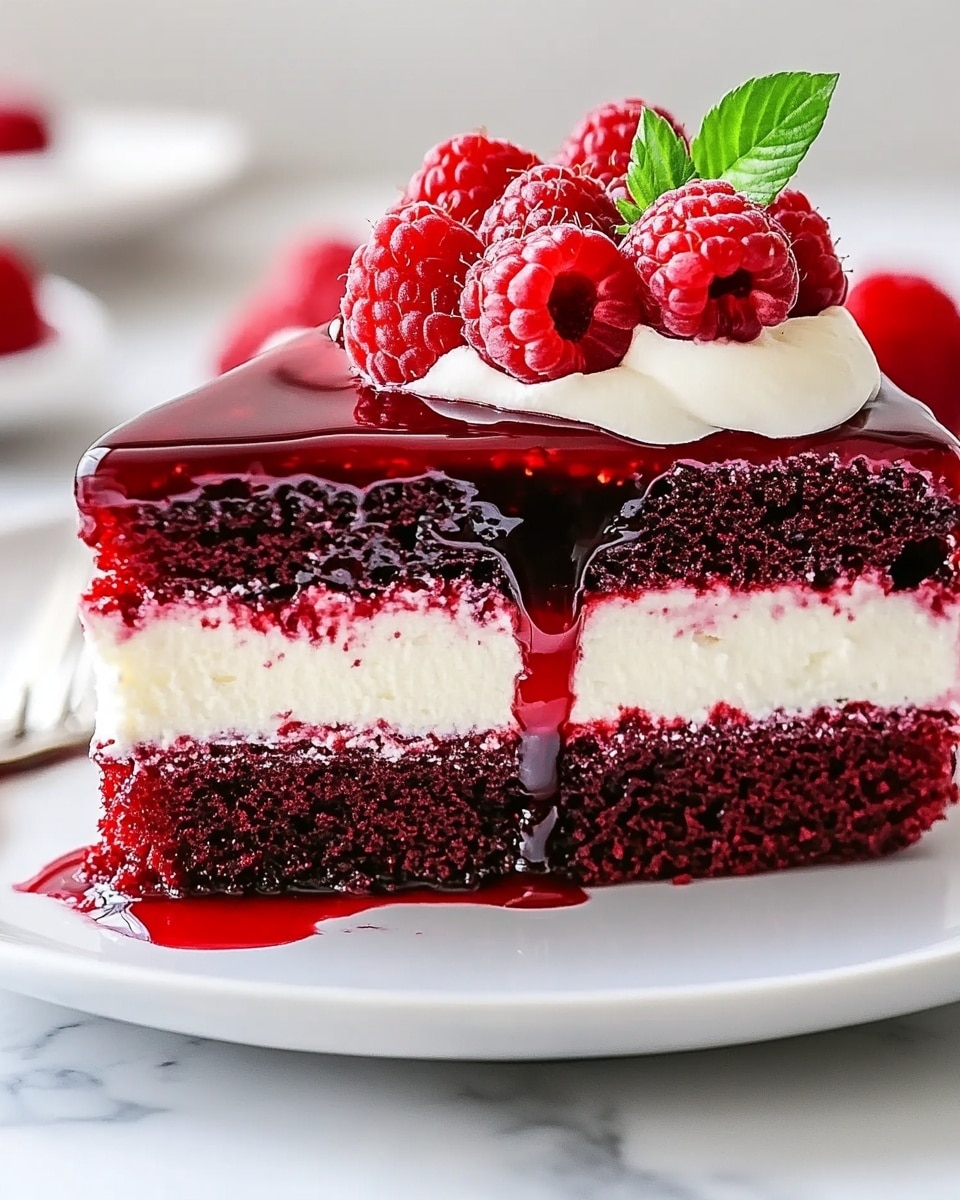
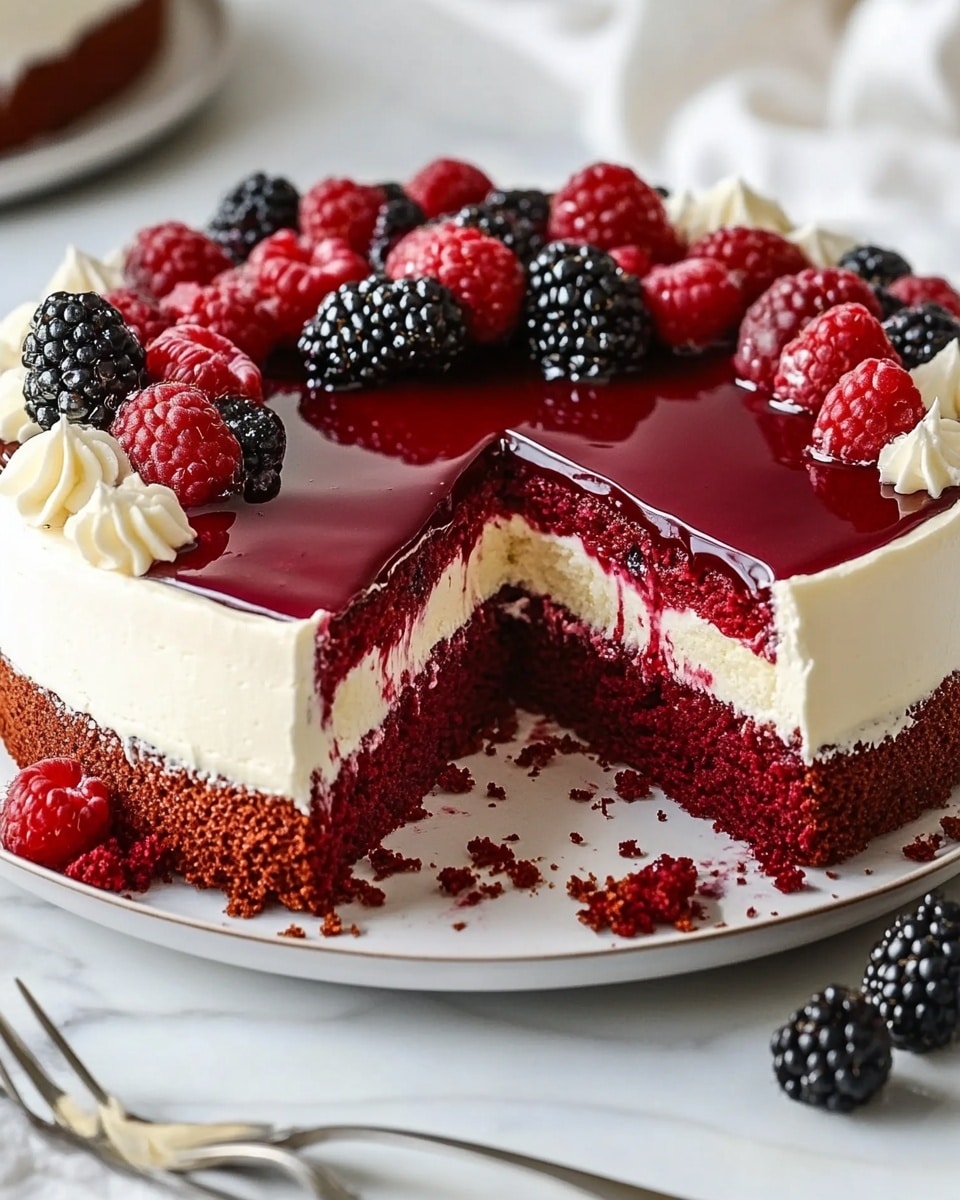
I love to top mine with fresh berries—strawberries, raspberries, or even blueberries add a lovely tart contrast that pairs perfectly with the richness. Sprinkling some red velvet crumbs from leftover cake bits adds texture and a pop of color. It’s these little touches that make it feel special and festive.
Side Dishes
For a simple coffee or tea party, this cheesecake shines all on its own. But if you want to be fancy, serve slices with a scoop of vanilla bean ice cream or a drizzle of chocolate sauce. Fresh mint leaves also uplift the plate if you’re feeling extra fancy.
Creative Ways to Present
Once, I made mini versions of this recipe in cupcake tins lined with cupcake liners—perfect for parties since everyone gets their own little cheesecake treat. You can also layer it in a clear trifle bowl with berries and whipped cream for a stunning presentation. The red layers look incredible and guests are always impressed!
Make Ahead and Storage
Storing Leftovers
I usually cover leftover cheesecake tightly with plastic wrap and keep it chilled in the fridge. It stays fresh and creamy for up to 4 days, which means you can enjoy your Red Velvet Cheesecake Bliss Recipe for several delicious days without losing that signature texture.
Freezing
Freezing works great if you want to make this well in advance. I slice the cheesecake before freezing, wrap each slice individually in plastic wrap, and then place them in an airtight container or freezer bag. This way, you can thaw just what you need. When properly frozen, it lasts about 2 months without losing flavor or texture.
Reheating
Since it’s a cheesecake, I don’t recommend reheating in the oven. Instead, just let your frozen slice thaw overnight in the fridge, then bring it to room temperature before serving. This keeps the creamy texture intact and tastes fresh every time.
FAQs
-
Can I make this Red Velvet Cheesecake Bliss Recipe without red food coloring?
Yes! You can substitute with beetroot powder for a natural red hue. It won’t be as vibrant but will still give a beautiful color and a mild earthy flavor. Just be sure to adjust the quantity to your preference, usually around 2 tablespoons is a good start.
-
Why does this recipe use both baking powder and baking soda?
Great question! Baking soda reacts with the acidic ingredients like buttermilk and vinegar to help the cake rise and get fluffy. Baking powder adds additional leavening for lightness. Using both ensures the perfect red velvet cake texture.
-
How do I avoid cracks in the cheesecake layer?
To prevent cracking, avoid overmixing your cheesecake batter, don’t open the oven door during baking, and cool the cheesecake gradually at room temperature before chilling. Also, using a water bath can help, but I’ve found careful baking and cooling work just as well.
-
Can I use a regular round cake pan instead of a springform?
You can, but it will be trickier to remove the cheesecake without damaging it. A springform pan is ideal because its sides come off, making it far easier to serve clean slices without cracking or breaking the cake.
Final Thoughts
This Red Velvet Cheesecake Bliss Recipe has become one of my absolute favorites to share. It’s that kind of dessert that feels both fancy and cozy—perfect to impress friends without too much fuss. If you try it, I promise you’ll enjoy both the process and every delicious bite. So go ahead, gather those ingredients, and treat yourself to this unforgettable dessert!
Print
Red Velvet Cheesecake Bliss Recipe
- Prep Time: 25 minutes
- Cook Time: 70 minutes
- Total Time: 5 hours 35 minutes
- Yield: 12 servings 1x
- Category: Dessert
- Method: Baking
- Cuisine: American
- Diet: Vegetarian
Description
Indulge in this decadent Red Velvet Cheesecake Bliss featuring a moist red velvet cake base topped with a creamy, rich cheesecake layer. Finished with a fluffy whipped cream topping and optional fresh berries or cake crumbs, this dessert perfectly marries the classic flavors of red velvet and cheesecake for a luxurious treat.
Ingredients
Red Velvet Cake Layer
- 1 ½ cups all-purpose flour
- 1 cup granulated sugar
- 1 tbsp cocoa powder
- 1 tsp baking powder
- ½ tsp baking soda
- ½ tsp salt
- 1 cup buttermilk
- 1 large egg
- ½ cup vegetable oil
- 2 tbsp red food coloring or beetroot powder for natural option
- 1 tsp vanilla extract
- 1 tsp white vinegar
Cheesecake Layer
- 16 oz cream cheese, softened
- ½ cup sour cream
- ½ cup granulated sugar
- 2 large eggs
- 1 tsp vanilla extract
- 2 tbsp all-purpose flour
Whipped Cream Topping
- 1 cup heavy cream
- 2 tbsp powdered sugar
- 1 tsp vanilla extract
Garnish (optional)
- Fresh berries
- Red velvet cake crumbs
Instructions
- Prepare the Red Velvet Cake Batter: In a large mixing bowl, sift together the flour, sugar, cocoa powder, baking powder, baking soda, and salt. In a separate bowl, combine the buttermilk, egg, vegetable oil, red food coloring or beetroot powder, vanilla extract, and white vinegar. Gradually add the wet ingredients to the dry ingredients, mixing until smooth and well combined.
- Bake the Red Velvet Cake Layer: Preheat your oven to 350°F (175°C). Grease and flour a 9-inch springform pan. Pour the red velvet cake batter into the prepared pan and bake for about 25-30 minutes, or until a toothpick inserted in the center comes out clean. Remove from the oven and let cool slightly.
- Prepare the Cheesecake Layer: In a clean bowl, beat the softened cream cheese until smooth and creamy. Add sour cream, sugar, eggs one at a time, vanilla extract, and flour, mixing well until the batter is smooth and uniform.
- Assemble and Bake the Cheesecake: Pour the cheesecake batter over the slightly cooled red velvet cake layer in the springform pan. Gently spread the batter evenly. Bake at 325°F (163°C) for 40-45 minutes until the cheesecake is mostly set but still slightly jiggly in the center.
- Cool the Cake: Remove the pan from the oven and allow it to cool to room temperature. Then refrigerate the cake for at least 4 hours or overnight to set completely.
- Prepare the Whipped Cream Topping: In a chilled bowl, whip the heavy cream with powdered sugar and vanilla extract until medium to stiff peaks form.
- Decorate and Serve: Spread the whipped cream over the chilled cheesecake layer. Garnish with fresh berries and red velvet cake crumbs if desired. Slice and serve chilled for the best experience.
Notes
- Ensure the cream cheese is softened to avoid lumps in the cheesecake batter.
- Do not overmix the batter to keep the cake tender and avoid deflating the cheesecake layer.
- Use beetroot powder as a natural alternative to red food coloring for a healthier option.
- Allow the cheesecake to fully chill before topping with whipped cream to prevent melting.
- A springform pan is recommended for easy removal of the cake.
Keywords: Red Velvet Cheesecake, Red Velvet Cake, Cheesecake Dessert, Layered Cake, Whipped Cream Topping, Holiday Dessert