Little Debbie Christmas Tree Cake Cookies Recipe
There’s something truly magical about the Little Debbie Christmas Tree Cake Cookies Recipe — it combines the nostalgia of a classic holiday treat with the fun of homemade cookies. Whenever I pull out this recipe during the festive season, my kitchen fills with that warm, sweet smell that just screams Christmas. The best part? They’re not only adorable but delightfully soft and perfect for sharing with family or taking to holiday parties.
If you love festive baking that brings smiles and memories, you’ll really enjoy tackling this recipe. It’s a playful twist on the iconic Little Debbie cakes, turning them into perfect cookies with layers of luscious vanilla buttercream. Trust me, once you try making these, they’ll become a go-to for your holiday baking lineup!
Ingredients You’ll Need
The ingredients here are simple, classic pantry staples that come together to create that nostalgic taste and texture you expect. It’s also nice that you can easily find everything without hunting specialty stores, and the few fresh ingredients ensure the cookies are rich and flavorful.
- All-purpose flour: This is the base for the cookie dough—choose a good quality flour for the best texture.
- Salt: Just a pinch to balance sweetness and enhance flavors.
- Baking powder: Helps the cookies rise just enough to be tender and soft.
- Butter: Unsalted and softened butter gives that rich, melt-in-your-mouth quality.
- Sugar: Regular granulated sugar for a perfect sweet crunch in the cookie.
- Egg: Room temperature works best to help the dough come together smoothly.
- Vanilla extract: Real vanilla is key here—it adds warmth and depth.
- Red food gel: For that festive color on the cookies—gel tends to be better than liquid for vividness.
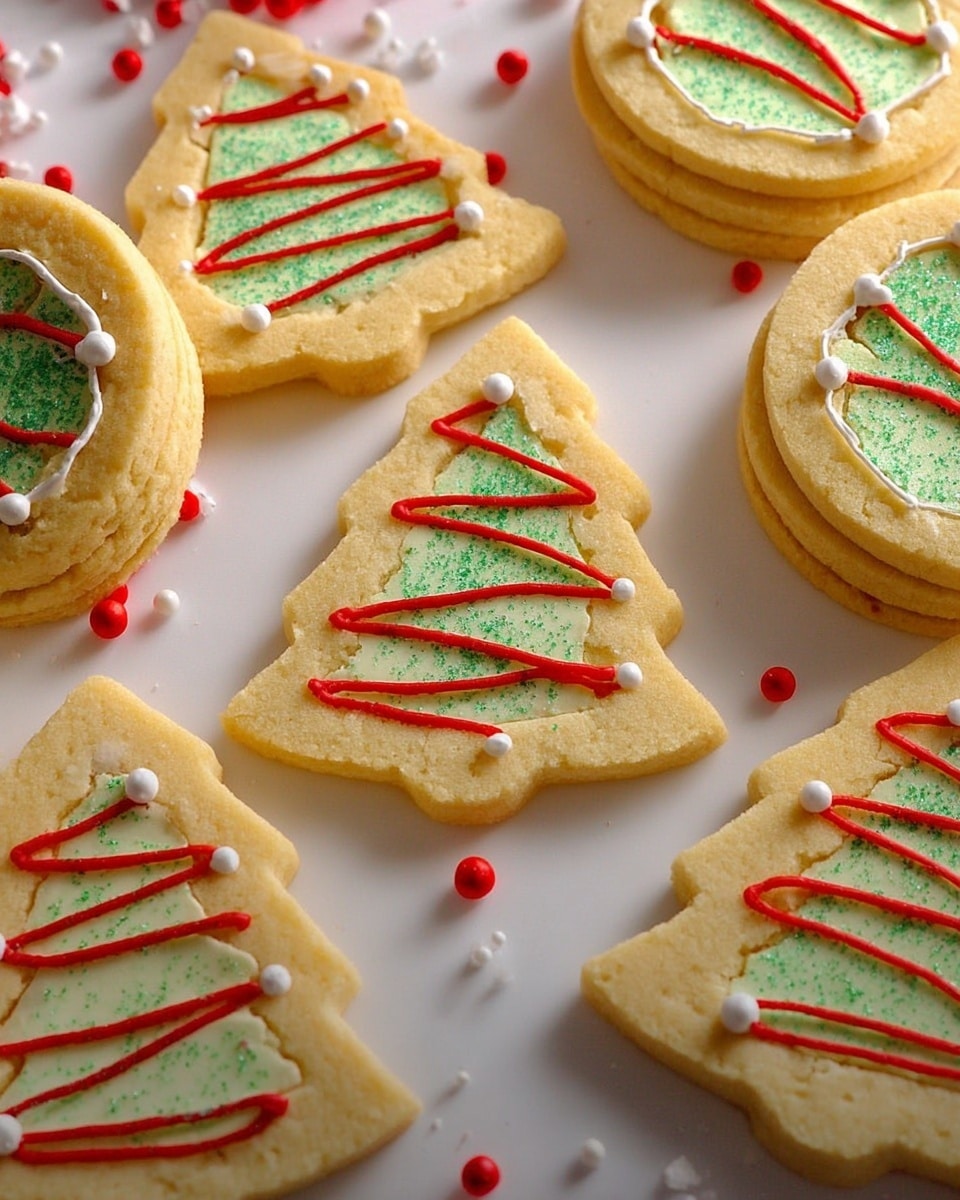
- Green sugar sprinkles: Adds a fun, sparkly texture and the perfect Christmas tree look.
- Unsalted butter (for buttercream): Make sure it’s softened to mix easily for your frosting.
- Confectioner’s sugar: This gives the buttercream its smooth sweetness.
- Salt (for buttercream): Just a little to balance the sweetness again.
- Vanilla extract (for buttercream): Keeps the flavor light and aromatic.
- Heavy whipping cream: Adjusted for frosting consistency—start with less, then add more if needed.
Variations
While I love making the classic version, it’s fun to tweak the Little Debbie Christmas Tree Cake Cookies Recipe to match your style or dietary needs. I often sprinkle extra green sugar for more sparkle or swap out the vanilla buttercream for a cream cheese frosting for a different zing.
- Chocolate version: I’ve tried adding a bit of cocoa powder to the dough, which creates a delightful chocolatey base that pairs beautifully with the vanilla frosting.
- Gluten-free: Using a 1:1 gluten-free flour blend works well here — just be gentle with mixing to keep the cookies tender.
- Vegan option: Substitute the butter and egg with vegan alternatives like coconut oil and flax egg, and use a dairy-free cream for the frosting.
- Flavor twist: Adding a splash of almond extract along with vanilla provides a lovely nutty aroma that’s unexpected but excellent.
How to Make Little Debbie Christmas Tree Cake Cookies Recipe
Step 1: Preparing the Dough
Start by whisking together your flour, salt, and baking powder in a bowl—this keeps everything evenly distributed and prevents clumps. In a separate large mixing bowl, cream the butter and sugar until light and fluffy. This step is crucial; don’t rush it because it gives the cookies a tender crumb. Then, add in the egg and vanilla extract, mixing until just combined. Gradually add the dry ingredients to wet and mix until the dough comes together. If your dough feels too sticky, a quick chill in the fridge for 15 minutes works wonders for easier handling.
Step 2: Shaping & Coloring the Cookies
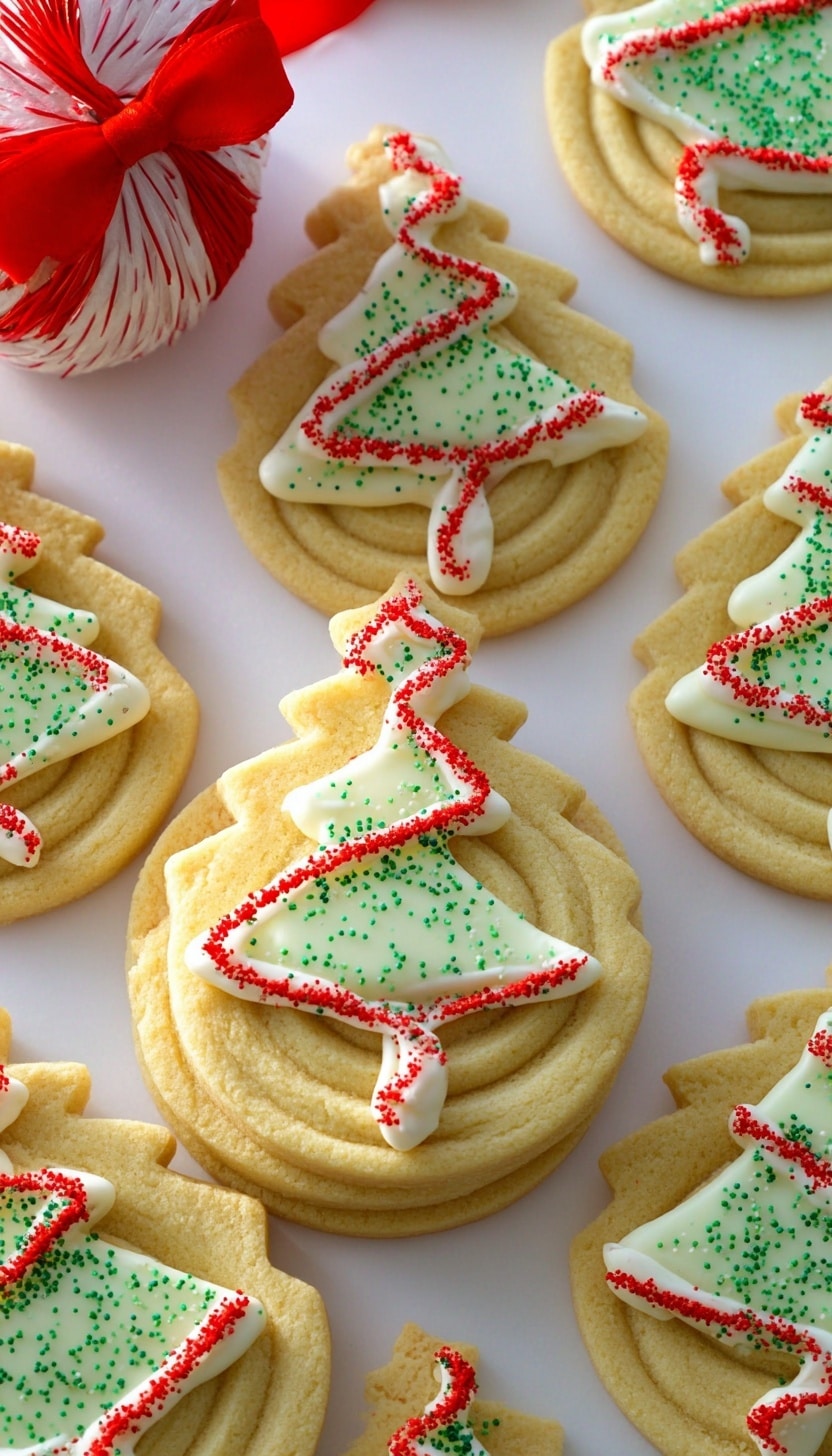
Divide the dough roughly in half. Add a few drops of red food gel to one half and knead gently to spread the color evenly—wear gloves if you’re worried about staining your hands! Leave the other half plain green sprinkles for later. Roll out the doughs separately on lightly floured surfaces to about 1/4 inch thickness. Now for the fun part: cut the dough into little Christmas tree shapes using a cookie cutter or carefully with a knife. Transfer the cookies to a baking sheet lined with parchment paper for baking.
Step 3: Baking the Cookies
Bake your cookies in a preheated 350°F (175°C) oven for about 8-10 minutes, or until the edges are set but the centers are still soft. Be careful not to overbake; you want them tender, not crunchy. Once baked, remove from the oven and let them cool on the sheet for a few minutes before transferring them to a wire rack to cool completely.
Step 4: Making the Vanilla Buttercream Filling
While the cookies cool, whip up the vanilla buttercream. Beat softened butter until creamy, then gradually add confectioner’s sugar, salt, and vanilla extract. Add heavy cream one tablespoon at a time to get the perfect spreading consistency—smooth, but not runny. Optional: add 1-2 drops of red food gel to tint the buttercream a soft pink for a festive look. Refrigerate briefly if the frosting gets too soft while assembling.
Step 5: Assembling Your Christmas Tree Cake Cookies
Once your cookies are completely cooled, spread a generous dollop of buttercream on the back of one cookie, then sandwich it with a second cookie of the opposite color for a festive contrast. Press gently to spread the filling evenly to the edges. Finish the look by lightly pressing green sugar sprinkles on the buttercream edges to resemble tree decorations. Let the cookies set for a bit before serving so the filling firms up nicely.
How to Serve Little Debbie Christmas Tree Cake Cookies Recipe
Garnishes
I’m a huge fan of finishing these cookies with a sprinkle of green sugar for that perfect sparkle, but you can also add tiny candy pearls or edible glitter to amp up the festive feel. Sometimes I arrange them on a platter lined with holly leaves or sprinkle powdered sugar for a “snowy” effect.
Side Dishes
These cookies pair wonderfully with hot drinks like homemade cocoa, mulled cider, or spiced tea. During holiday parties, I like to serve them alongside a cheese platter or fresh fruit to balance the sweetness.
Creative Ways to Present
Once, I made a centerpiece with these cookies stacked like a tiny Christmas tree on a cake stand, which was a big hit at my holiday gathering. Wrapping individual cookies in clear cellophane tied with red and green ribbons also makes a lovely gift that feels homemade and thoughtful.
Make Ahead and Storage
Storing Leftovers
After assembling, I store my Little Debbie Christmas Tree Cake Cookies in an airtight container at room temperature for up to 3 days. It helps to keep a layer of parchment between layers so they don’t stick. If you want them even fresher, they’re best eaten within 24 hours.
Freezing
I’ve frozen these cookies both before and after assembling. If you freeze before adding the buttercream, wrap the baked cookies tightly, then thaw at room temperature before frosting. If freezing after assembling, use a freezer-safe container with parchment paper in between. They keep well up to a month.
Reheating
Since these cookies are soft, they don’t really need reheating—but if you want that just-baked warmth, pop them in a 300°F oven for about 5 minutes. Avoid microwaving as it can melt the buttercream filling too much.
FAQs
-
Can I use liquid food coloring instead of gel for this recipe?
You can use liquid food coloring, but gel is preferred because it gives a more vibrant color without altering the dough’s consistency. Liquid coloring might make the dough too wet, so if you use it, add just a drop or two and adjust flour if needed.
-
How do I make sure my cookies stay soft and don’t get crunchy?
Watch the baking time carefully—the cookies should come out just as the edges are set and centers look slightly underbaked. Overbaking is the usual culprit for dry, crunchy cookies. Also, using room temperature butter helps keep them tender.
-
What’s the best way to pipe or spread the buttercream filling?
I find that spreading with an offset spatula or butter knife works best for this recipe since the filling isn’t too stiff. If you want a neater look, you can use a piping bag with a round tip, but don’t overfill or the cookies might slide apart.
-
Can I make the cookies ahead of time and assemble later?
Absolutely! Bake and cool the cookies, then store them in an airtight container. When you’re ready to serve, prepare the buttercream and assemble fresh to keep that filling nice and creamy.
-
How do I prevent the cookies from sticking to the baking sheet?
Using parchment paper or a silicone baking mat is your best bet. These make clean-up easy and keep your cookies intact when transferring. Avoid greasing the pan because it can spread the cookies too much.
Final Thoughts
Making the Little Debbie Christmas Tree Cake Cookies Recipe is like wrapping up a warm holiday memory in every bite. They’re perfect for sharing, gifting, or just indulging when you need a little Christmas cheer. Honestly, every year I look forward to baking these with my kids—they’re excited to help decorate, and it creates such a special cozy moment. I hope you enjoy making (and eating!) these as much as I do. Give it a try this season, and I promise you’ll have a new festive favorite to add to your baking repertoire.
Print
Little Debbie Christmas Tree Cake Cookies Recipe
- Prep Time: 20 minutes
- Cook Time: 10 minutes
- Total Time: 40 minutes
- Yield: Approximately 24 sandwich cookies 1x
- Category: Dessert
- Method: Baking
- Cuisine: American
Description
These Little Debbie Christmas Tree Cake Cookies are festive, soft, and bursting with holiday cheer. Inspired by the classic snack cakes, these cookies combine a tender vanilla cookie base with a luscious vanilla buttercream filling dyed a festive red, then decorated with green sugar sprinkles to mimic a Christmas tree. Perfect for holiday parties or as a delightful seasonal treat.
Ingredients
Cookie Dough
- 2 cups all-purpose flour
- 1/4 tsp salt
- 1/4 tsp baking powder
- 1/2 cup butter, softened
- 1 cup sugar
- 1 egg, room temperature
- 2 tsp vanilla extract
Decoration
- Red food gel (for coloring dough or design)
- Green sugar sprinkles
Vanilla Buttercream Filling
- 3/4 cup unsalted butter, room temperature
- 3 1/2 cups confectioner’s sugar
- 1/4 tsp salt
- 1 tsp vanilla extract
- 3–5 tbsp heavy whipping cream
- 1–2 drops red food gel
Instructions
- Prepare the Cookie Dough: In a medium bowl, whisk together the all-purpose flour, salt, and baking powder. In a separate large bowl, cream the softened butter and sugar until light and fluffy. Beat in the egg and vanilla extract until combined. Gradually add the dry ingredients to the wet ingredients, mixing until a smooth dough forms. Optionally, tint a small portion of the dough with red food gel to add decorative accents.
- Shape and Bake Cookies: Preheat your oven to 350°F (175°C). Roll out the dough on a lightly floured surface to about 1/4 inch thickness. Use cookie cutters shaped like Christmas trees to cut out cookies. Place the cookies on a parchment-lined baking sheet about 1 inch apart. Sprinkle with green sugar sprinkles. Bake for 8-10 minutes, or until the edges begin to turn golden. Allow cookies to cool completely on a wire rack.
- Make Vanilla Buttercream Filling: In a large bowl, beat the unsalted butter until smooth and creamy. Gradually add the confectioner’s sugar, salt, and vanilla extract while continuing to beat. Add heavy whipping cream one tablespoon at a time until desired consistency is reached—smooth and spreadable. Mix in 1 to 2 drops of red food gel until the buttercream is a festive red hue.
- Assemble the Cookies: Once the cookies are completely cool, spread a generous amount of the red vanilla buttercream onto the flat side of one cookie. Top with another cookie to create a sandwich. Repeat with all cookies.
- Decorate: Optionally, drizzle additional buttercream on top or add extra green sugar sprinkles to enhance the festive look. Chill the assembled cookie cakes for about 30 minutes to set the filling before serving.
Notes
- Make sure the butter and egg are at room temperature for proper mixing.
- You can store assembled cookies in an airtight container in the refrigerator for up to 5 days.
- Allow cookies to cool completely before adding buttercream to prevent melting.
- The red food gel can be omitted or replaced with other colors to suit your decoration preference.
- If you prefer a softer cookie, reduce baking time slightly.
Keywords: Christmas cookies, sandwich cookies, buttercream filling, holiday desserts, festive treats, vanilla cookies