Homemade Granola Bars with Peanut Butter, Honey, and Chocolate Chips Recipe
There’s something so comforting about a homemade snack that you can grab on the go, and that’s exactly why I adore this Homemade Granola Bars with Peanut Butter, Honey, and Chocolate Chips Recipe. It hits all the right notes—sweet, nutty, and just the right amount of chocolatey to keep you satisfied. Whether you’re rushing out the door for work or packing a treat for the kids’ lunchboxes, these bars deliver flavor and energy without the junk.
What makes these Homemade Granola Bars with Peanut Butter, Honey, and Chocolate Chips Recipe stand out to me is how simple and friendly it is to customize. You can whip up a batch with ingredients that probably live in your pantry already, and the natural peanut butter and honey combo keeps things wholesome yet indulgent at the same time.
Ingredients You’ll Need
The magic of this recipe really comes down to combining just a handful of whole, natural ingredients that balance each other perfectly—sweetness from the honey, creamy richness from the peanut butter, and a touch of chocolate to keep things fun. Pick quality basics, and the bars turn out great every time.
- Peanut Butter: I use very smooth creamy natural peanut butter for easy mixing and that pure nutty flavor.
- Honey: Adds natural sweetness and acts as the perfect binder for the bars.
- Vanilla Extract: A splash really enhances the overall flavor without being overpowering.
- Sea Salt: Just a pinch balances the sweetness and highlights the other ingredients.
- Whole Rolled Oats: Go for old-fashioned oats here—they add great texture and heartiness.
- Mini Chocolate Chips: These little pockets of chocolate are the secret to making these bars feel like a real treat.
- Pepitas (or crushed peanuts/cashews): Adds a nice crunch and extra nutty flavor; I like pepitas for a twist.
Variations
I like to mix things up depending on what’s in the pantry or the season. Feel free to personalize this recipe and make it your own—granola bars are forgiving and versatile!
- Nut-free version: Swap peanut butter for sunflower seed butter and replace nuts with seeds like pumpkin or sunflower for allergy-friendly bars.
- Fruit boost: Toss in dried cranberries, raisins, or chopped dried apricots for a touch of chewy sweetness.
- Spiced flavor: Add a teaspoon of cinnamon or a pinch of nutmeg—I’ve done this during fall, and it’s so cozy.
- Extra crunch: Mix in toasted coconut flakes or chopped almonds for a delightful texture contrast.
How to Make Homemade Granola Bars with Peanut Butter, Honey, and Chocolate Chips Recipe
Step 1: Warm and Combine the Sticky Stuff
Start by gently warming the peanut butter and honey together in a small saucepan over low heat or in the microwave in short bursts. Stir until smooth and glossy—this not only makes it easier to mix later but also helps the bars hold together better. Don’t overheat it; just warm enough to blend smoothly.
Step 2: Mix in Vanilla and Salt
Remove the peanut butter-honey mix from heat and stir in the vanilla extract and sea salt. This step is key for layering the flavors—you’ll notice even a small splash of vanilla makes the bars taste richer and more homemade.
Step 3: Combine Dry Ingredients
In a large bowl, toss together the oats, pepitas (or crushed nuts), and mini chocolate chips. This makes sure each bar will have a perfect crunch and bursts of chocolate throughout. Make sure the oats are evenly mixed so your bars hold together nicely.
Step 4: Stir Everything Together
Pour the warm peanut butter and honey mixture over the oats and chocolate chip blend. Use a sturdy spoon or spatula to fold everything until all the dry ingredients are thoroughly coated. The mix should feel sticky and hold together when pressed; if it’s too crumbly, just add a touch more honey.
Step 5: Press and Chill
Line a baking pan (about 8×8 inches) with parchment paper and transfer your mixture in. Press firmly and evenly into the pan—I like to use the bottom of a glass or a spatula for this. The firmer the press, the better your bars will hold their shape after chilling. Pop it in the fridge for at least 2 hours to set.
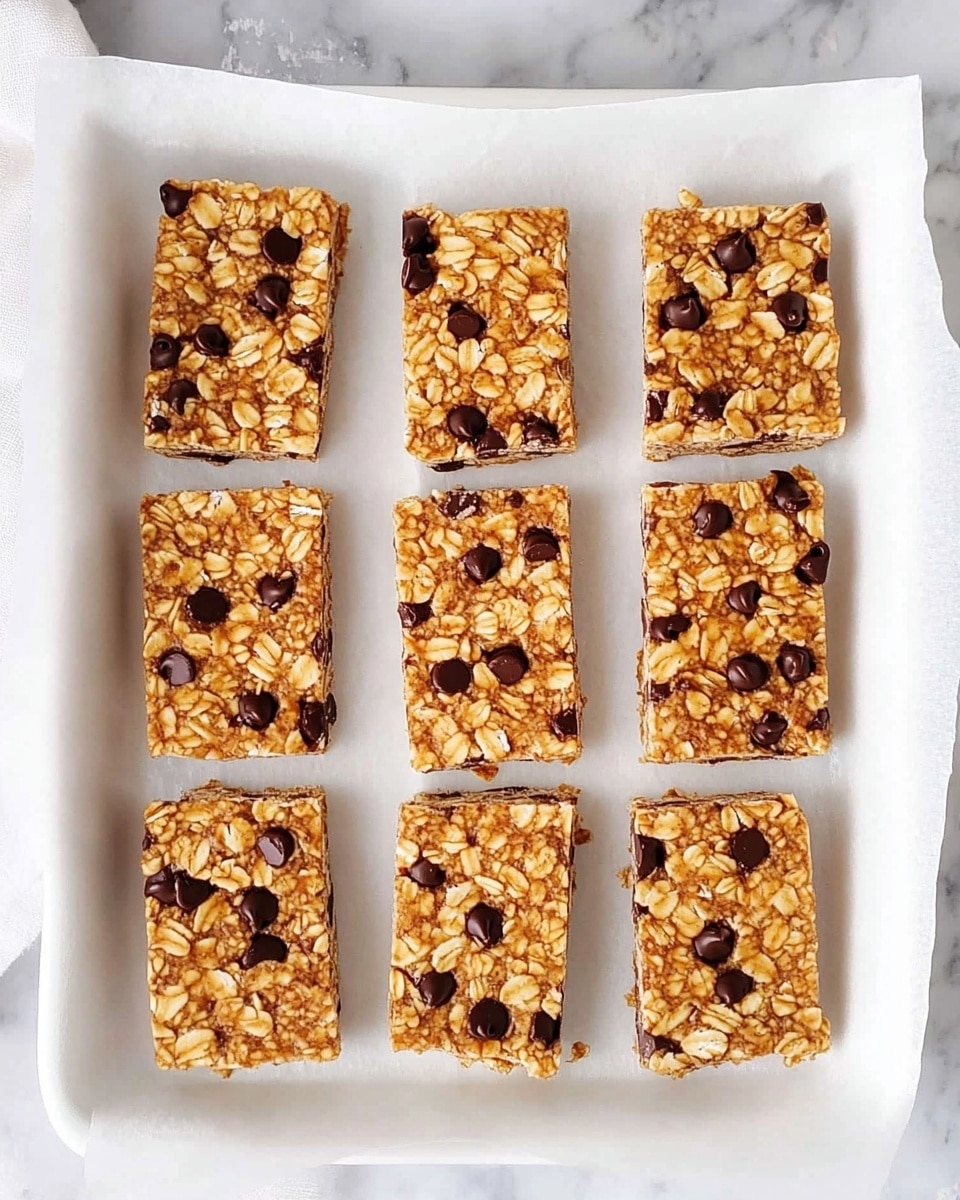
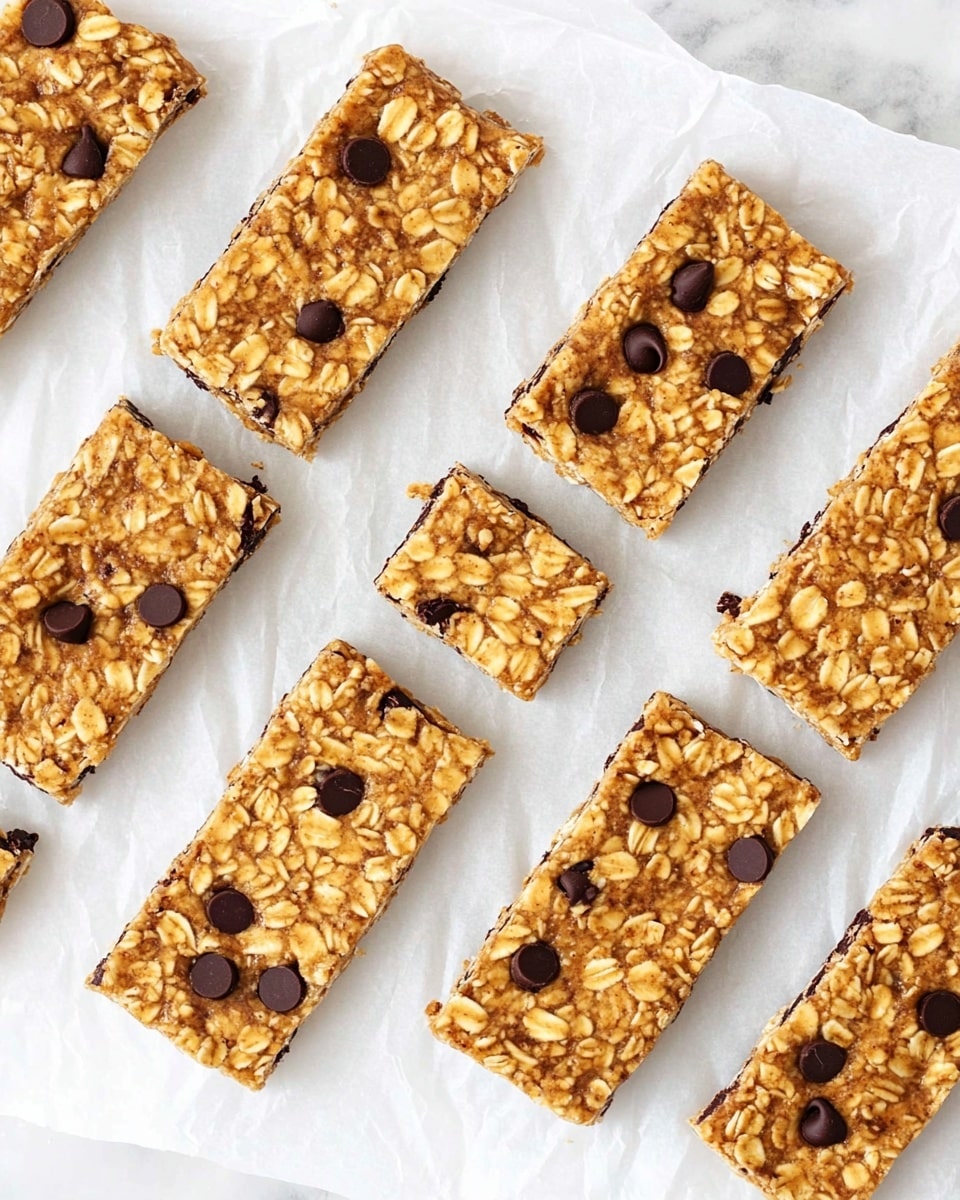
Step 6: Cut and Enjoy
Once chilled, lift the granola block out of the pan using the edges of the parchment paper and transfer it to a cutting board. Use a sharp knife to slice into bars or squares. If you find the knife dragging, let the bars chill a little longer or dip the knife in hot water for smoother cuts.
How to Serve Homemade Granola Bars with Peanut Butter, Honey, and Chocolate Chips Recipe
Garnishes
When I serve these, I sometimes sprinkle a few extra pepitas or chocolate chips on top right before pressing the mixture into the pan to make them look extra inviting. A tiny drizzle of melted dark chocolate over the top before chilling works wonders for a fancy twist!
Side Dishes
I love pairing these bars with a fresh fruit salad in the morning or a cup of creamy yogurt on the side. They’re also great with a hot cup of coffee or tea for a midday pick-me-up.
Creative Ways to Present
For gatherings, I like to wrap each granola bar in parchment paper tied with a little twine or ribbon. It makes them perfect for gifting or party favors. You could also stack them in a mason jar or arrange on a rustic wooden board for a cozy snack platter.
Make Ahead and Storage
Storing Leftovers
I store leftover granola bars tightly wrapped in parchment or in an airtight container in the fridge. They keep their texture well for up to a week, which is great for quick grab-and-go snacks throughout the week.
Freezing
Freezing these granola bars works like a charm. I individually wrap them in plastic wrap and then place them in a freezer-safe zip bag. When unwrapped properly, they thaw quickly at room temperature and taste just as fresh.
Reheating
If you like your granola bars a little warm, I recommend microwaving them for 15-20 seconds or popping them in a low oven for a few minutes. This melts the chocolate just enough, making them extra dreamy without losing their shape.
FAQs
-
Can I use crunchy peanut butter instead of creamy?
You can, but keep in mind that crunchy peanut butter adds texture and can make the bars less sticky, which might affect how well they hold together. If you love a bit of crunch, it’s worth a try, but I usually stick with creamy for the best binding.
-
How do I make these granola bars vegan?
Simply swap the honey for maple syrup or agave nectar and ensure your chocolate chips are dairy-free. The rest of the ingredients are naturally vegan, making this an easy adjustment.
-
Can I bake these bars instead of chilling?
This particular recipe is designed to set in the fridge since it relies on the peanut butter and honey to bind. Baking might dry the bars out. For baked granola bars, you’d want a different recipe with egg or another binder.
-
How long do these granola bars last?
Stored in an airtight container in the fridge, they’ll stay fresh for about a week. If frozen, they can last up to 2-3 months without loss of flavor or texture.
-
Can I add protein powder to this recipe?
Yes! Adding a scoop or two of your favorite protein powder can boost the nutrition. Just be mindful it might make the mixture drier, so you may need to increase honey or peanut butter slightly for proper binding.
Final Thoughts
Honestly, this Homemade Granola Bars with Peanut Butter, Honey, and Chocolate Chips Recipe has become a staple in my kitchen because it’s both reliable and flexible. I love how it lets me customize each batch with whatever nuts, seeds, or dried fruits I have on hand. It’s a recipe you’ll keep coming back to when you want quick, wholesome snacks that taste like a treat. Trust me, once you make these, your store-bought bars might become a thing of the past!
Print
Homemade Granola Bars with Peanut Butter, Honey, and Chocolate Chips Recipe
- Prep Time: 10 minutes
- Cook Time: 0 minutes
- Total Time: 2 hours 10 minutes
- Yield: 12 bars 1x
- Category: Snack
- Method: No-Cook
- Cuisine: American
- Diet: Vegetarian
Description
These Homemade Granola Bars are a delicious and nutritious snack made with creamy natural peanut or cashew butter, honey, and rolled oats. Sweetened with a touch of vanilla and sea salt, and studded with mini chocolate chips and crunchy pepitas or nuts, they are easy to prepare and perfect for on-the-go energy boosts or healthy treats.
Ingredients
Wet Ingredients
- 1 cup very smooth creamy natural peanut butter, or cashew butter
- ⅔ cup honey
- 1 teaspoon vanilla extract
Dry Ingredients
- Heaping ½ teaspoon sea salt
- 2½ cups whole rolled oats
- ⅓ cup mini chocolate chips
- 3 tablespoons pepitas, or crushed peanuts or cashews
Instructions
- Combine wet ingredients: In a large mixing bowl, add the creamy peanut or cashew butter, honey, and vanilla extract. Stir thoroughly until the mixture is smooth and well combined.
- Add sea salt and oats: Sprinkle in the sea salt and then gradually add the rolled oats to the wet mixture. Use a spatula or spoon to fold the ingredients together until the oats are evenly coated and the mixture is thick but cohesive.
- Mix in chocolate chips and nuts: Gently fold in the mini chocolate chips and the pepitas or chosen nuts, distributing them evenly throughout the mixture without melting the chocolate chips.
- Press mixture into pan: Line a square baking pan with parchment paper. Transfer the granola mixture into the pan and press it firmly and evenly into the corners and edges to ensure the bars hold their shape when cut.
- Chill to set: Place the pan in the refrigerator for at least 2 hours or until the mixture is firm and set enough to slice easily.
- Cut and store: Once set, remove from the refrigerator and lift the granola slab out using the parchment paper. Cut into bars of desired size and store in an airtight container in the refrigerator for up to one week or freeze for longer storage.
Notes
- For a nut-free version, substitute nut butters with sunflower seed butter and use seeds like pumpkin seeds (pepitas) only.
- Honey can be replaced with maple syrup for a vegan alternative.
- Use gluten-free oats if you require a gluten-free snack.
- Press the mixture firmly into the pan to ensure the bars hold together well after cutting.
- If you prefer chewier bars, reduce chilling time slightly; for firmer bars, chill longer.
Keywords: granola bars, homemade granola bars, peanut butter bars, healthy snacks, no bake granola bars, energy bars, easy snack recipes