Fresh Homemade Pita Bread Recipe
I’m so excited to share this Fresh Homemade Pita Bread Recipe with you because it’s one of those simple kitchen triumphs that really makes you feel like a baking star. There’s something incredibly satisfying about pulling warm, pillowy pitas fresh out of your own oven—no more gum-chewing store-bought versions! Whether you’re planning a casual dinner with dips or just want a fresh bread alternative, this recipe is a winner every time.
Fresh Homemade Pita Bread Recipe is more than just tasty; it’s surprisingly easy to make and uses basic pantry ingredients you probably already have. I remember the first time I made it, I was amazed at how fluffy and soft the pitas turned out, with those perfect pockets that are just begging to be stuffed. You’ll find making your own pita not only fun but also a great way to impress friends and family without spending hours in the kitchen.
Ingredients You’ll Need
These ingredients come together in a perfectly balanced way to give you soft, airy pitas with just a little chew. Each one plays a role in making sure the dough rises well and bakes to that classic pita puff.
- All-purpose flour: The backbone of the dough, all-purpose flour is great for creating soft yet sturdy pitas.
- Lukewarm water: Just warm enough to activate the yeast without killing it—think cozy bath temp.
- Active dry yeast or instant dry yeast: This little guy helps your dough rise and gives you those signature pita pockets.
- Sugar: Feeds the yeast for a better rise and subtly sweetens the bread.
- Salt: Brings out the flavors and balances the sweetness.
- Olive oil: Adds moisture and a gorgeous, tender crumb while infusing a subtle richness.
Variations
I love experimenting with this Fresh Homemade Pita Bread Recipe to suit different meals or moods. Don’t be afraid to tweak it a bit—once you’ve nailed the basics, the fun begins!
- Whole Wheat Pita: I swapped half the all-purpose flour with whole wheat for a nuttier, heartier pita. It adds great texture and nutrition.
- Garlic and Herb Pitas: Adding finely minced garlic and chopped herbs to the dough turns the bread into a flavorful side perfect for Mediterranean meals.
- Gluten-Free Version: While more challenging, I’ve used gluten-free flour blends successfully, just be sure to add a binding agent like xanthan gum.
How to Make Fresh Homemade Pita Bread Recipe
Step 1: Activate the yeast
Start by mixing your lukewarm water with sugar and yeast. Give it a gentle stir and let it sit for 5 to 10 minutes until it’s foamy on top. If it doesn’t foam, your yeast might be old or the water too hot or cold—don’t skip this step as it ensures your pitas puff up beautifully.
Step 2: Mix and knead your dough
Combine the flour and salt in a bowl, then pour in the yeast mixture and olive oil. Stir until the dough just comes together, then knead on a floured surface for about 8-10 minutes until smooth and elastic. If the dough feels sticky, sprinkle a little more flour, but keep it soft—that’s key for tender pitas.
Step 3: Let the dough rise
Place the dough in an oiled bowl, cover it with a clean kitchen towel or plastic wrap, and let it rise in a warm spot for about 1 to 1.5 hours, or until doubled in size. I like to put mine near the stove or inside an oven with just the light on—perfect cozy spot for dough!
Step 4: Shape your pitas
Punch down the dough and divide it into 8 equal pieces. Roll each piece into a ball, then flatten with a rolling pin into roughly 1/4-inch thick circles. Try to keep them even for consistent puffing when baked.
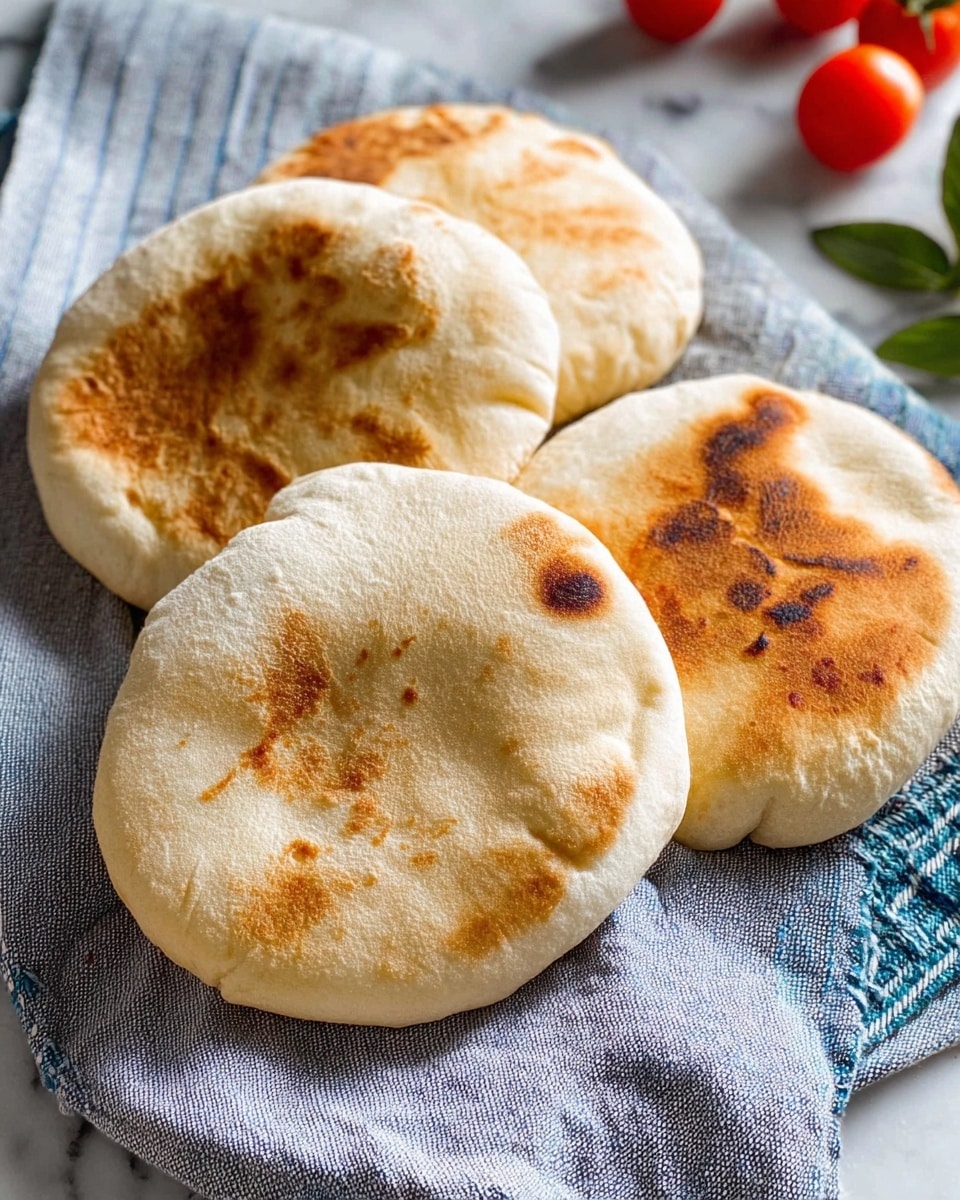
Step 5: Bake for perfect pockets
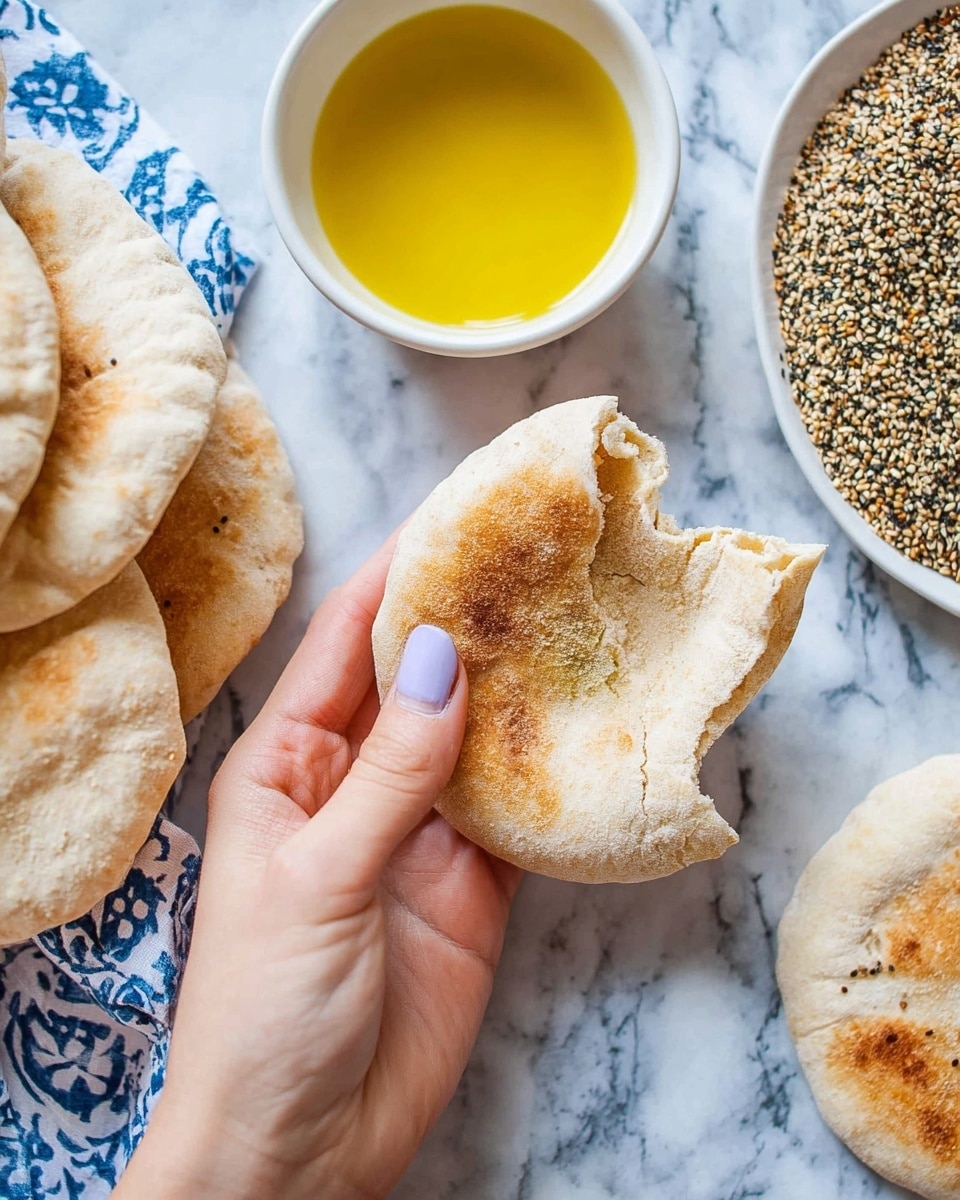
Preheat your oven to 475°F (245°C) and place a baking sheet or pizza stone inside to get super hot. Bake pitas in batches, 2-3 at a time, for 3-5 minutes. You’ll see them puff up like little balloons—that’s your pocket forming! Don’t overbake; just get golden spots and soft puffs.
How to Serve Fresh Homemade Pita Bread Recipe
Garnishes
I love brushing fresh pitas with a little olive oil and sprinkling flaky sea salt or za’atar right after baking. It adds a fragrant layer that makes each bite special—plus, it’s super simple to do!
Side Dishes
This pita pairs perfectly with creamy hummus, babaganoush, or my favorite tzatziki sauce. For heartier meals, try it with grilled kebabs or a fresh Greek salad. Honestly, it’s a Swiss Army knife for Mediterranean dishes.
Creative Ways to Present
Have you ever cut pita pockets into triangles and made mini pita chips? I like to serve them on a party platter with assorted dips for easy snacking. Or stuff them with colorful veggies and falafel for a fun wrap experience at picnics.
Make Ahead and Storage
Storing Leftovers
I store extra pitas in an airtight container at room temperature if I’m using them within a couple of days. Keeping them sealed helps maintain softness, but they’re best eaten fresh, so I try to bake just what I need!
Freezing
Freezing is a game-changer. I separate pitas with parchment paper, then stash them in a freezer bag. When you want some, just thaw at room temp or pop them straight in the toaster or oven—no soggy bread struggles here!
Reheating
To reheat, I lightly sprinkle water on the pitas and wrap them in foil before warming in a 350°F oven for about 5-7 minutes. This trick brings back their softness and that lovely just-baked warmth.
FAQs
-
Can I make Fresh Homemade Pita Bread Recipe without yeast?
While traditional pita relies on yeast for its airy texture and puffed pockets, you can try baking soda or baking powder as a leavening substitute but expect denser, flatter bread. The classic recipe really shines with yeast for those signature pockets.
-
How do I know when pita bread is done baking?
The pitas should puff up prominently and develop light golden brown spots. If they remain pale or doughy, they need a bit more time. Remember to watch closely since ovens vary and overbaking can dry them out.
-
Why didn’t my pitas puff up to form pockets?
Common causes include rolling the dough too thin or too thick, not preheating the baking surface enough, or dough that hasn’t risen properly. Make sure your oven and baking stone or sheet are very hot before baking.
-
Can I use whole wheat flour for this Fresh Homemade Pita Bread Recipe?
You can substitute part or all of the all-purpose flour with whole wheat for a heartier pita. Keep in mind the texture will be denser and may need a bit more water. I usually start with half whole wheat for best results.
Final Thoughts
This Fresh Homemade Pita Bread Recipe has become a staple in my kitchen because it’s truly comforting and easy enough to whip up on any given day. Nothing beats the feeling of a warm pita split open and filled with your favorite ingredients or dipped in a creamy hummus. Give this recipe a try—you’ll find it’s not just bread, it’s a little celebration of homemade goodness you’ll want to make again and again.
Print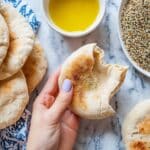
Fresh Homemade Pita Bread Recipe
- Prep Time: 15 minutes
- Cook Time: 20 minutes
- Total Time: 1 hour 35 minutes
- Yield: 8 pita breads 1x
- Category: Bread
- Method: Baking
- Cuisine: Middle Eastern
- Diet: Vegetarian
Description
This Pita Bread recipe creates soft, fluffy pockets perfect for stuffing with your favorite fillings. Made from simple ingredients like flour, water, yeast, sugar, salt, and olive oil, these homemade pita breads are easy to prepare and bake to perfection, resulting in warm, pillowy rounds that puff up beautifully in the oven.
Ingredients
Dry Ingredients
- 3⅓ cups all-purpose flour
- 2 teaspoons active dry yeast or instant dry yeast
- 2 teaspoons sugar
- 2 teaspoons salt
Wet Ingredients
- 1¼ cups lukewarm water
- 2 tablespoons olive oil
Instructions
- Activate the Yeast: In a small bowl, combine the lukewarm water, sugar, and yeast. Stir gently and let it sit for 5 to 10 minutes until the mixture becomes frothy and bubbly, indicating that the yeast is active.
- Mix the Dough: In a large mixing bowl, whisk together the flour and salt. Make a well in the center and pour in the activated yeast mixture and olive oil. Stir with a wooden spoon until a shaggy dough forms.
- Knead the Dough: Transfer the dough onto a lightly floured surface and knead for about 8 to 10 minutes until the dough is smooth, elastic, and slightly tacky but not sticky. You can also knead in a stand mixer fitted with a dough hook for 6-7 minutes.
- First Rise: Place the kneaded dough in a lightly oiled bowl and cover it with a damp cloth or plastic wrap. Let it rise in a warm, draft-free area for about 1 to 1.5 hours, or until it has doubled in size.
- Shape the Pitas: Punch down the dough to release air and divide it into 8 equal pieces. Roll each piece into a ball and let them rest for 10 minutes. Then, on a floured surface, roll each ball into a circle about 6-7 inches in diameter, about ¼ inch thick.
- Preheat the Oven and Baking Surface: Place a baking stone or an inverted baking sheet on the middle rack of your oven and preheat to 475°F (245°C). This ensures the pita bread cooks quickly and puffs up.
- Bake the Pitas: Carefully transfer 2 to 3 rolled dough rounds onto the hot baking surface. Bake for 3 to 4 minutes until they puff up and develop light golden spots. Avoid opening the oven during baking to maintain the heat. If the pitas don’t puff, bake a little longer until done.
- Cool and Serve: Remove the baked pitas from the oven and place them in a clean kitchen towel to keep warm and soft. Repeat baking with remaining dough rounds. Serve warm or at room temperature.
Notes
- Make sure water is lukewarm (around 100-110°F) to activate the yeast properly without killing it.
- If pitas don’t puff, it could be due to thickness of rolled dough or oven temperature being too low.
- Pita bread is best served fresh but can be stored in an airtight container for up to 2 days.
- Reheat pitas wrapped in foil at 350°F for 5 minutes to refresh softness.
Keywords: pita bread, homemade pita, Middle Eastern bread, flatbread, yeast bread