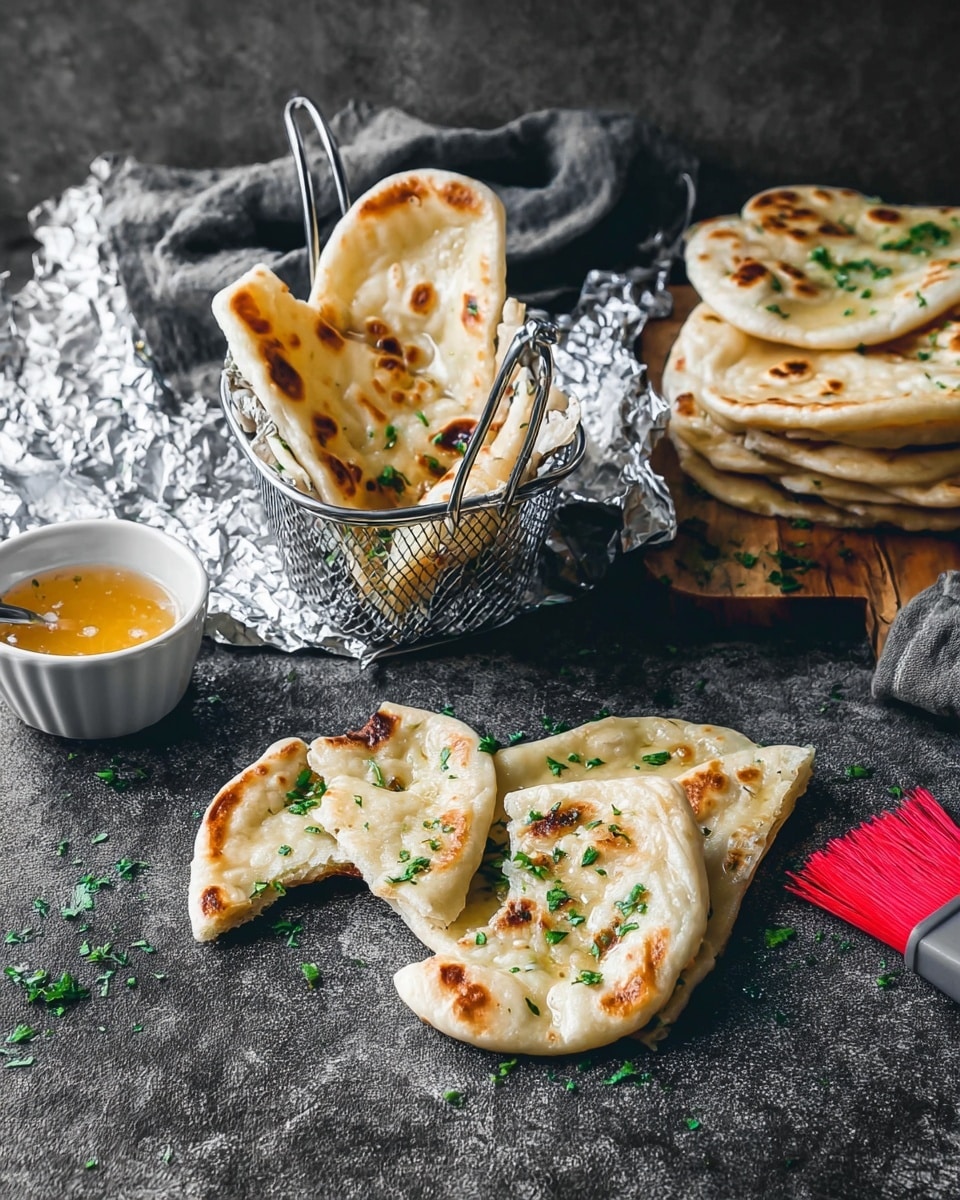
Easy Garlic Pita Bread from Scratch Recipe
There’s something incredibly satisfying about pulling warm, fluffy pita bread fresh out of your oven—especially when it’s infused with that irresistible garlic flavor. This Easy Garlic Pita Bread from Scratch Recipe is one of those kitchen gems I keep coming back to because it’s simple, quick, and delivers such a comforting result every time. Whether you’re making it for a weeknight dinner or impressing guests at a casual gathering, there’s just something special about the combination of soft pita pockets with a rich garlic butter finish.
What really sets this recipe apart is how approachable it is, even if you’ve never made homemade bread before. The dough comes together quickly with everyday ingredients, and the garlic butter topping? Pure magic. Once you get the hang of this Easy Garlic Pita Bread from Scratch Recipe, you’ll find yourself craving it often—and trust me, your friends will too.
Ingredients You’ll Need
Each ingredient in this recipe plays a crucial role, balancing flavor and texture to give you that authentic garlic pita experience. When shopping, try to grab fresh, quality staples—your bread will thank you!
- Water: Warm water between 90º-95ºF wakes up your yeast perfectly without killing it—think of it like a cozy bath for tiny bubbles.
- Instant Yeast: No need to proof this one, making it quick and fuss-free; just stir it in with your dry ingredients.
- Granulated Sugar: A pinch to help your yeast bloom and gently sweeten the dough.
- All-Purpose Flour: The backbone of your dough—using fresh flour yields the best texture.
- Salt: Enhances flavor and controls yeast activity so your bread rises just right.
- Garlic Powder (optional in dough): Adds a subtle garlicky undertone, whetting the appetite before baking.
- Extra Virgin Olive Oil: For richness and a tender crumb; plus, it helps keep your dough from sticking.
- Unsalted Butter: The star of the garlic butter spread, ensuring a creamy, luscious topping.
- Garlic Powder (for butter): Amplifies that signature flavor with ease.
- Kosher Salt: Adds that perfect seasoning kick to the garlic butter.
- Dried Parsley: For a fresh, herby note that brightens the butter.
- Shredded Parmesan Cheese (optional): My secret weapon—sprinkled on top, it gives a lovely savory crunch.
Variations
Like any good recipe, this Easy Garlic Pita Bread from Scratch Recipe can be tailored to your mood or pantry. I love mixing things up depending on what I have on hand or who I’m serving. Personalizing it makes it feel like your own little kitchen creation.
- Herbed Variation: Toss in some dried oregano or thyme into the dough or garlic butter—my family adores the extra aroma and flavor this gives.
- Whole Wheat Twist: Swap half the all-purpose flour for whole wheat for nuttier flavor and extra fiber; just add a touch more water if it feels dry.
- Spicy Garlic: Add a pinch of red chili flakes to the garlic butter to give your pita a little kick that wakes up your taste buds.
- Cheesy Stuffed Pitas: Before baking, stuff pita pockets with mozzarella or feta for melty, gooey pockets that are irresistible.
- Vegan Friendly: Replace butter with olive oil garlic spread and skip the cheese—easy and just as tasty!
How to Make Easy Garlic Pita Bread from Scratch Recipe
Step 1: Activate the yeast and combine wet ingredients
Start by heating your water to that warm 90º-95ºF range—warm but not hot—then pour it into a large mixing bowl. Sprinkle in the instant yeast and sugar. Gently stir it, then wait around 5 minutes until it looks foamy on top. This bubbly sign means your yeast is alive and ready to do its magic. If you don’t see foam, don’t panic; your yeast might be inactive, so try fresh yeast or warmer water next time.
Step 2: Mix dry ingredients and start the dough
Next, whisk together most of the flour (start with 2½ cups), salt, and garlic powder in a separate bowl. Slowly add this mixture into your yeast water, followed by the olive oil. Stir everything together with a wooden spoon or your hands until the dough starts to come together. If it feels super sticky, add the remaining flour a little at a time until it’s soft but not tough. This hands-on approach is where you’ll get a feel for the dough’s perfect texture.
Step 3: Knead the dough until smooth and elastic
Lightly flour your work surface and turn your dough out. Knead it with the heels of your hands for about 8-10 minutes. It should become silky, stretchy, and elastic—not dry or crumbly. I love to use this time to listen to my favorite music or catch up on a podcast. Kneading well is key to that perfect pita puff!
Step 4: Let the dough rise until doubled
Rub a bit of olive oil on the inside of a clean bowl and place your dough inside, turning it so it’s lightly coated with oil all over. Cover the bowl with a damp kitchen towel or plastic wrap, and let it rest in a warm spot for about 1–1½ hours. You’re looking for the dough to roughly double in size. Pro tip: I sometimes preheat my oven to 100ºF, then turn it off and place the bowl inside for a super cozy rise.
Step 5: Divide and shape pita rounds
Once risen, punch down the dough gently to deflate it, then divide it into 6-8 equal portions. Roll each piece into a smooth ball, then let them rest for 10 minutes under your towel—this relaxes the gluten. After resting, use a rolling pin to flatten each ball into a round about 1/4-inch thick—thin enough to puff, not so thin it tears.
Step 6: Cook the pita bread on a hot skillet
Heat a dry cast-iron skillet or non-stick pan over medium-high heat. Once hot, place one round in the pan and cook for about 1-2 minutes until bubbles form on top and the bottom has golden brown spots. Flip and cook the other side for another 1-2 minutes. The magic? The heat causes steam inside to puff the pita, creating that beautiful pocket. Keep the cooked pitas warm by wrapping them loosely in a clean kitchen towel while you finish the rest.
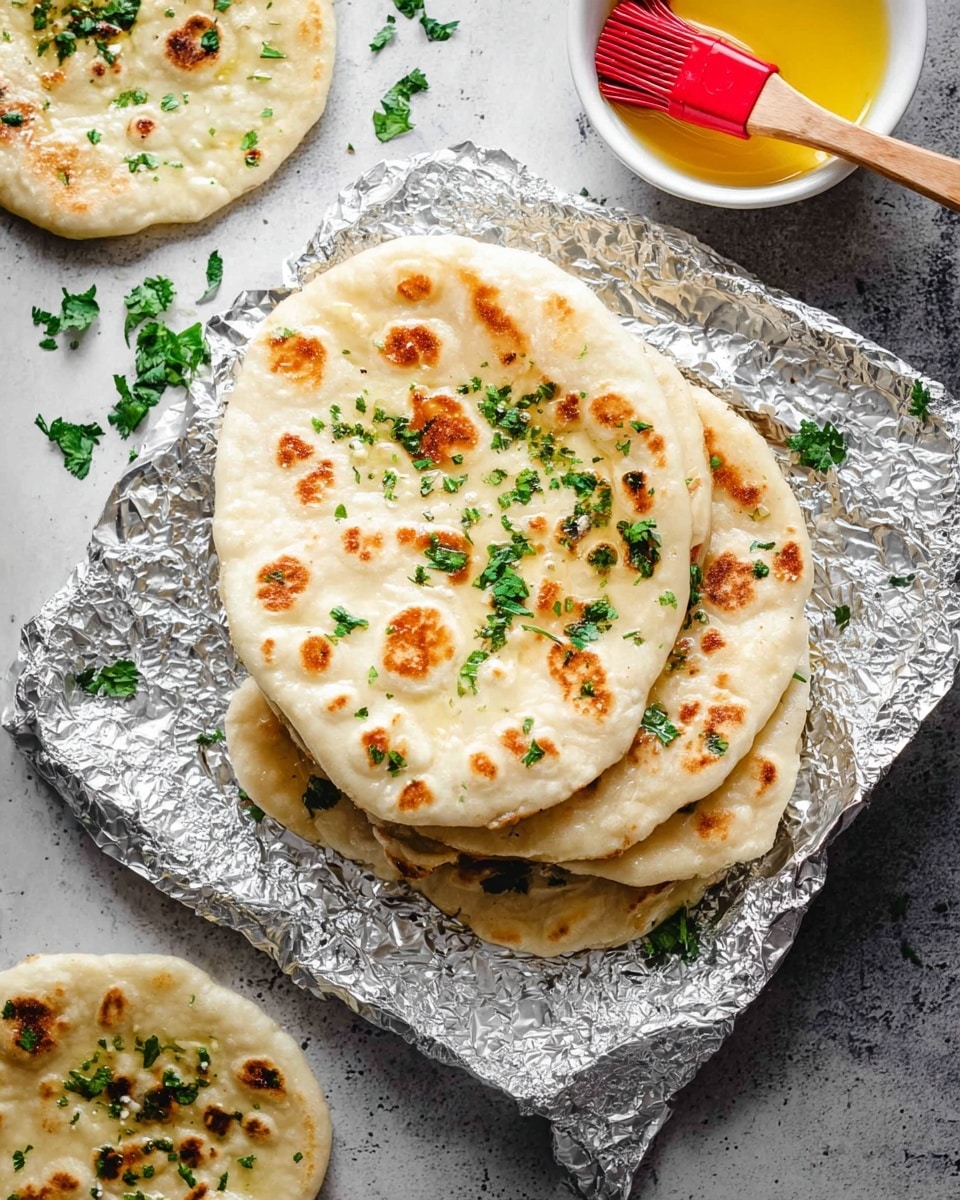
Step 7: Make the garlic butter and brush it on
While pitas cook, melt butter gently in a small saucepan. Stir in garlic powder, kosher salt, and dried parsley. Once your warm pitas are done, brush them generously with this buttery garlic mixture. If you want to step it up, sprinkle some shredded parmesan cheese on top while the butter is warm—trust me, it’s a game changer.
How to Serve Easy Garlic Pita Bread from Scratch Recipe
Garnishes
I keep it simple with a sprinkle of fresh parsley or a pinch of sea salt for that finishing touch. Sometimes I like a dusting of extra parmesan for a salty, melty crunch that makes each bite sing. These little garnishes really elevate the garlic pita without much effort.
Side Dishes
This Easy Garlic Pita Bread from Scratch Recipe pairs beautifully with Mediterranean dips like hummus, baba ganoush, or tzatziki. I also adore serving it alongside grilled veggies or a fresh Greek salad for a light, balanced meal. If you’re feeling indulgent, it’s perfect with a rich lamb gyro or shawarma plate.
Creative Ways to Present
For gatherings, I’ve arranged these garlic pitas on a rustic wooden board layered with colorful dips, fresh herbs, and marinated olives. Folding the pitas into little pockets filled with roasted garlic butter beans or crumbled feta gives a wow-factor finger food. It’s always a hit when guests can assemble their own pita bites!
Make Ahead and Storage
Storing Leftovers
I store leftover pita bread in an airtight container or zip-top bag at room temperature for up to 2 days. To keep them soft, I like wrapping them in foil after a quick reheat. If you forget about them, they’re still salvageable with a few smart tricks.
Freezing
I’ve froze these pitas successfully by stacking them with parchment paper between each piece inside a freezer-safe bag. They keep well for up to 3 months. Just thaw at room temp or overnight in the fridge when you’re ready, and they’ll taste fresh and lovely.
Reheating
To reheat, I prefer popping the pita for 1-2 minutes in a hot skillet or wrapping it in foil and warming in a 350ºF oven for 5-7 minutes. Avoid microwaving for too long to keep that soft, fluffy texture instead of making it chewy or rubbery.
FAQs
-
Can I use active dry yeast instead of instant yeast for this recipe?
Yes, you can! With active dry yeast, you’ll want to proof it in the warm water with sugar for about 5-10 minutes until it becomes frothy before mixing it into the dry ingredients. Instant yeast skips this step, but both work well here.
-
What’s the secret to pitas puffing up during cooking?
High heat and the right dough thickness are key! The dough traps steam inside when heated quickly, causing it to puff and create that pocket. Be sure your pan is hot and roll the dough to about 1/4-inch thick.
-
Can I add fresh garlic instead of garlic powder?
Fresh garlic can be quite potent and may affect dough hydration, so it’s best used in the garlic butter spread rather than the dough. If you want more garlic punch in the bread, stick to the powder in dough and fresh minced garlic in the butter.
-
How long does this pita bread keep fresh?
Stored in an airtight container at room temperature, pita bread stays fresh for about 2-3 days. For longer storage, freezing is your best bet.
-
Is this recipe suitable for beginners?
Absolutely! This Easy Garlic Pita Bread from Scratch Recipe is straightforward, no fancy equipment needed, and forgiving. With the tips provided, you’ll get great results even if this is your first time making bread.
Final Thoughts
This Easy Garlic Pita Bread from Scratch Recipe holds a special place in my heart because it turns simple pantry staples into something downright delicious and memorable. There’s a quiet joy in baking these warm, garlicky pitas and sharing them with people you love—or just enjoying them with a cozy night in. I hope you’ll give this recipe a try and make it your own little kitchen tradition too. You won’t regret the aroma, the taste, or the smiles that come after the first bite!
Print
Easy Garlic Pita Bread from Scratch Recipe
- Prep Time: 20 minutes
- Cook Time: 20 minutes
- Total Time: 1 hour 50 minutes
- Yield: 6 to 8 pita breads 1x
- Category: Bread
- Method: Stovetop
- Cuisine: Mediterranean
Description
This Easy Garlic Pita Bread from Scratch recipe features soft, fluffy pita pockets infused with savory garlic flavor. Made with simple ingredients including water, yeast, flour, and a hint of garlic powder, these homemade pitas are brushed with a flavorful garlic butter and optionally topped with parmesan cheese for an irresistible savory treat. Perfect for sandwiches, dips, or enjoyed on their own.
Ingredients
Pita Dough
- 1 cup water, 90º-95ºF
- 2 teaspoons instant yeast
- ½ teaspoon granulated sugar
- 2 ½ to 3 cups all-purpose flour, divided
- 1 ½ teaspoons salt
- 1 teaspoon garlic powder (optional)
- 2 tablespoons extra virgin olive oil, plus more for greasing bowl
Garlic Butter
- ½ cup unsalted butter
- 1 ½ teaspoons garlic powder
- ½ teaspoon kosher salt
- ½ teaspoon dried parsley
- Shredded parmesan cheese (optional, for topping)
Instructions
- Activate Yeast: In a small bowl, combine the warm water, instant yeast, and granulated sugar. Stir gently and let it sit for about 5 minutes until foamy, indicating the yeast is active.
- Prepare Dough: In a large mixing bowl, whisk together 2 ½ cups of the flour, salt, and garlic powder if using. Add the olive oil and the activated yeast mixture. Stir with a wooden spoon or dough hook until a rough dough forms.
- Knead Dough: Turn the dough onto a lightly floured surface and knead for about 8-10 minutes, adding the remaining flour as needed, until the dough is smooth, elastic, and slightly tacky but not sticky.
- First Rise: Lightly oil a large bowl with extra virgin olive oil. Place the dough in the bowl and turn to coat with oil. Cover with a clean kitchen towel or plastic wrap and let the dough rise in a warm place for 1 to 1 ½ hours, or until doubled in size.
- Divide and Shape: Punch down the dough to release air. Divide the dough into 6 to 8 equal portions. Roll each portion into a ball, then roll each ball out into a 6 to 7-inch diameter circle on a floured surface.
- Second Rise: Place the rolled dough circles on a floured surface or parchment paper and cover them with a towel. Let rest for 20-30 minutes, allowing the dough to puff slightly.
- Prepare Garlic Butter: While the dough rests, melt the unsalted butter in a small saucepan over low heat. Stir in garlic powder, kosher salt, and dried parsley. Remove from heat and set aside.
- Cook Pitas: Heat a dry skillet or cast iron pan over medium-high heat. Place one rolled dough circle in the hot skillet and cook for about 1-2 minutes until bubbles form and the bottom is golden brown. Flip and cook the other side for 1-2 minutes. The pita should puff up, forming a pocket. Remove and immediately brush with the garlic butter. Repeat with remaining dough circles.
- Optional Topping: If desired, sprinkle shredded parmesan cheese over the piped garlic butter while still warm.
- Serve: Serve the garlic pita warm as a side, with dips, or stuffed with your favorite fillings.
Notes
- Use water at the correct temperature (90º-95ºF) to properly activate the yeast without killing it.
- The garlic powder in the dough is optional but enhances the garlic flavor throughout.
- For fluffier pitas, do not roll the dough too thin; aim for about ¼ inch thickness.
- If pitas do not puff up, press down gently on them with a spatula while cooking to encourage puffing.
- Store leftover pitas in an airtight container at room temperature for up to 2 days or freeze for longer storage.
- Reheat pitas wrapped in a damp paper towel in the microwave or in a skillet to restore softness.
Keywords: garlic pita bread, homemade pita, garlic butter pita, easy pita bread, Mediterranean bread