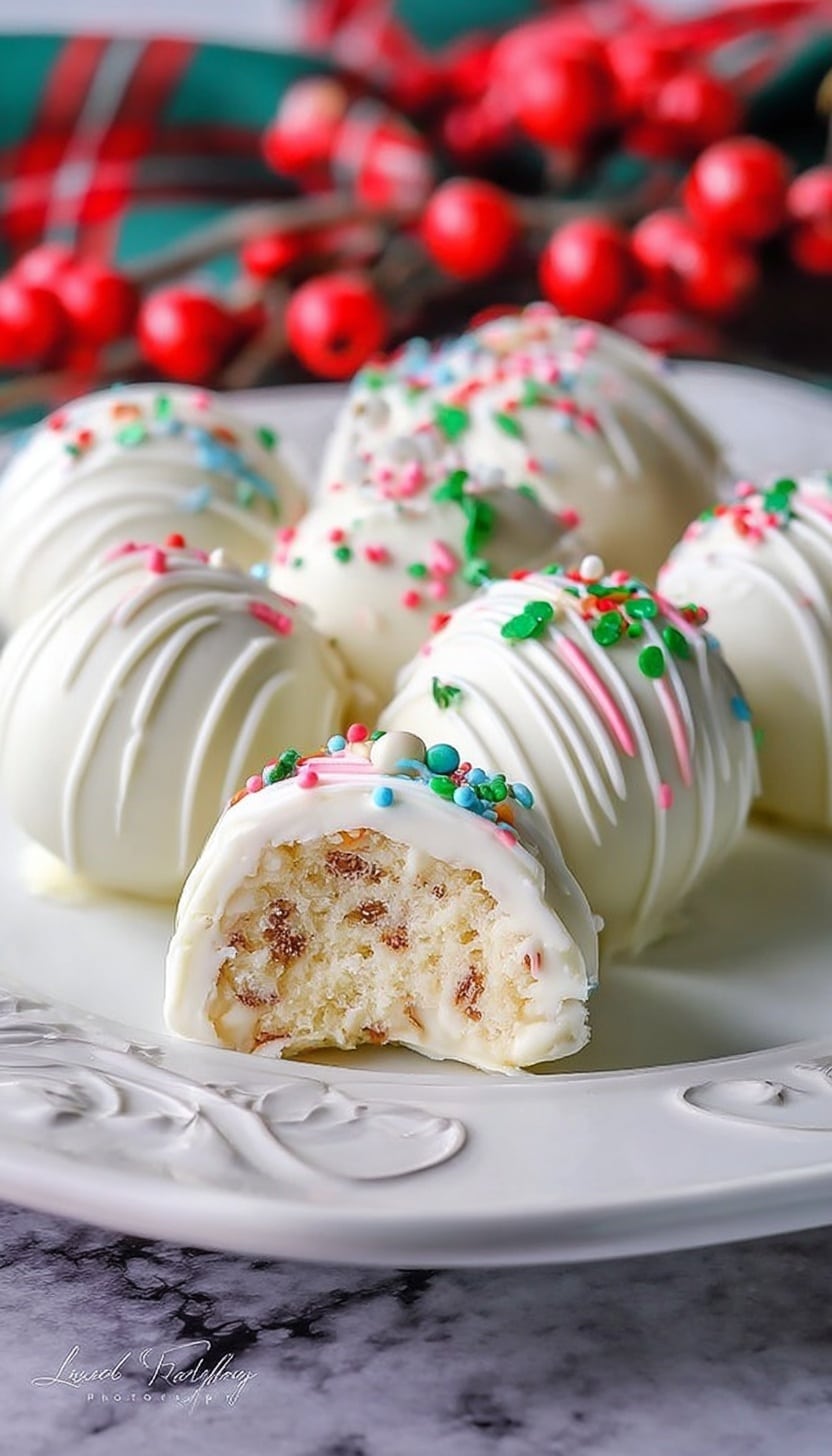
Little Debbie Christmas Tree Cake Balls Recipe
If you’re looking for a fun, festive treat to add some sparkle to your holiday dessert table, the Little Debbie Christmas Tree Cake Balls Recipe is an absolute must-try. These little cake balls combine the nostalgic charm of Little Debbie’s iconic Christmas Tree Cakes with a creamy twist that’s sure to make everyone’s taste buds dance. What I love most is how easy they are to whip up, yet they look so impressive and fancy – perfect for holiday parties, gift trays, or just a sweet pick-me-up after a chilly day.
Whenever I make these, friends always ask for the recipe because they’re that addictive. The Little Debbie Christmas Tree Cake Balls Recipe is special because it takes a beloved classic and transforms it into bite-sized joy, all coated in crisp white candy melts with just the right amount of festive sparkle. Plus, it’s straightforward enough that even if you’ve never made cake balls before, you’ll be a pro after just one batch!
Ingredients You’ll Need
Each ingredient works harmoniously to create that perfect balance—sweet cake, creamy binding, and a smooth, festive coating. When shopping, make sure your cream cheese is at room temperature for easier mixing and keep an eye out for quality white candy melts that melt smoothly without clumping.
- Vanilla Little Debbie Christmas Tree Cakes: These are the star of the show; crumbling them finely gives you a great cake base with festive flavor.
- Cream cheese: Room temperature cream cheese blends easily and adds that rich, slight tang, which helps bind the cake crumbs into perfect little balls.
- White candy melts: These give your cake balls a smooth, glossy finish that’s ideal for decorating and adds that nice snap when you bite.
- Red candy melts (optional): Perfect for adding festive swirls or accents—melted and drizzled over the white coating for that cheerful touch.
- Red and green colored sanding sugar: Sprinkle these on top for festive sparkle and to give the cake balls that classic Christmas tree vibe.
Variations
I love making this recipe my own depending on the occasion or mood—and you should too! Feel free to get creative with flavors or decorations, as these cake balls make a perfect canvas for festive personalization.
- Chocolate lovers: Swap out the white candy melts for milk or dark chocolate melts. I did this last year, and the richness paired with the vanilla cake was killer!
- Nutty twist: Gently fold in some crushed pecans or almonds inside the cake ball mixture for extra texture and festive flair.
- Gluten-free option: Use store-bought gluten-free vanilla cake crumbs or make your own to fit your dietary needs.
- Festive toppings: Beyond sanding sugar, try edible glitter, mini candy canes crushed finely, or holiday-themed sprinkles—they instantly amp up the holiday cheer.
How to Make Little Debbie Christmas Tree Cake Balls Recipe
Step 1: Crumble the Little Debbie Christmas Tree Cakes
Start by removing the cakes from their packaging and crumbling them into a large mixing bowl. You want finer crumbs here for smooth cake balls, so break them apart gently with your hands or pulse in a food processor if you want to speed things up. Take your time here; uneven chunks can make shaping a bit tricky later.
Step 2: Mix in room temperature cream cheese
Add the entire 8-ounce package of room temperature cream cheese to the crumbled cakes. Using a spatula or your hands (wear gloves if you prefer), mix until the crumbs and cream cheese come together into a sticky, dough-like mixture. If it feels too dry, add just a bit more cream cheese—but be careful not to make it too wet or the balls won’t hold.
Step 3: Shape and chill
Roll the mixture into small bite-sized balls, around 1 to 1.5 inches in diameter. Place them on a parchment-lined baking sheet and pop them into the fridge for at least 30 minutes. This chilling step is crucial—it firms them up so dipping goes smoothly without the balls falling apart.
Step 4: Dip in melted white candy melts
Melt the white candy melts according to package instructions—usually in 30-second bursts in the microwave with stirring in between works well. Using a fork or dipping tool, dunk each chilled cake ball into the candy melts until fully coated. Gently tap off any extra coating and place them back on the parchment paper. Don’t rush here—the coating sets quickly, so work in batches.
Step 5: Decorate with red and green sanding sugar
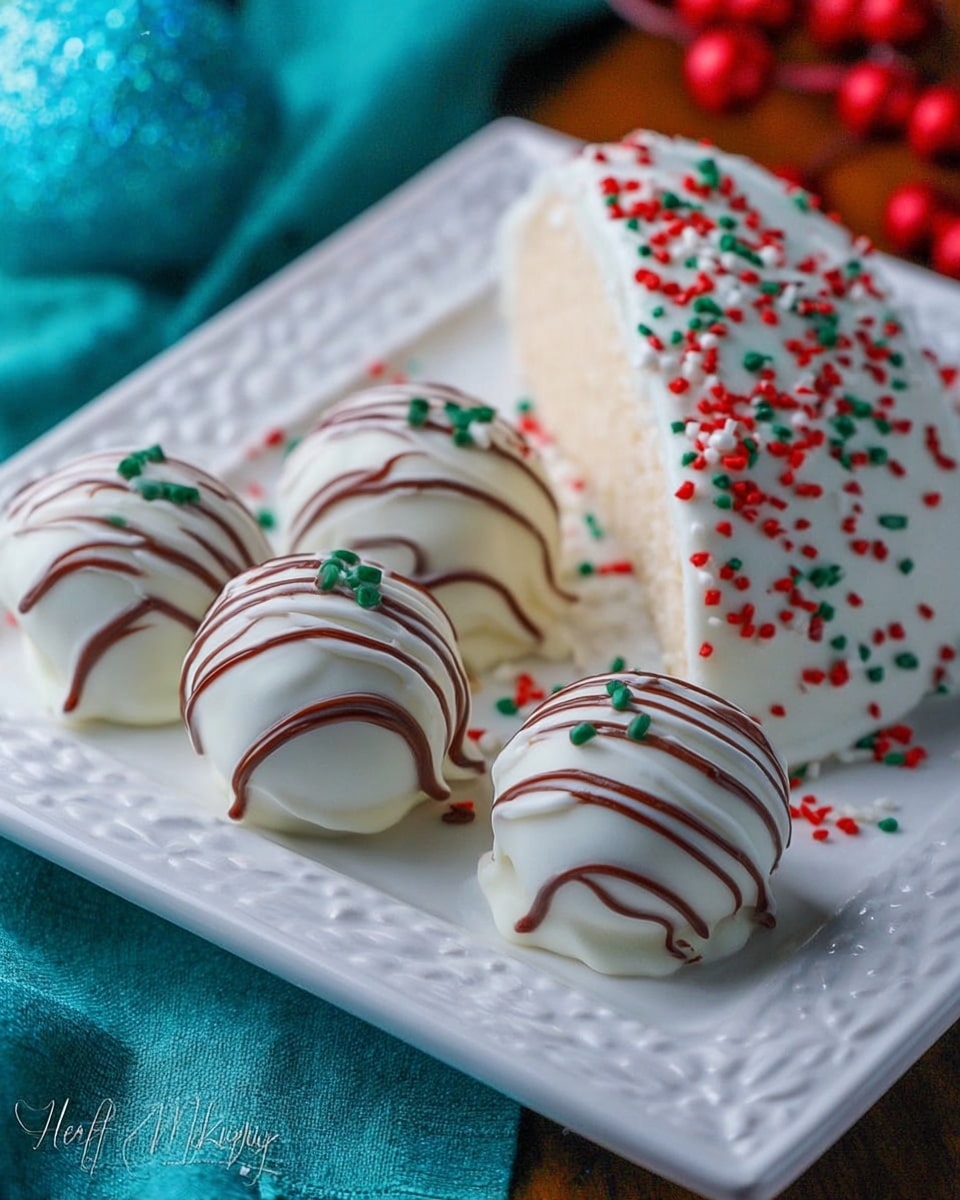
While the coating is still wet, sprinkle red and green sanding sugar over the top. This gives a festive, sparkling finish that feels just right for holiday celebrations. If you’re feeling artistic, drizzle some melted red candy melts over the balls for swirls or stripes, just like I like to do for extra color contrast.
Step 6: Let them set completely
Allow the cake balls to sit at room temperature or in the fridge until the candy melts harden and the decorations are set. This usually takes about 15-20 minutes. Once firm, they’re ready to serve or package beautifully as gifts.
How to Serve Little Debbie Christmas Tree Cake Balls Recipe
Garnishes
I usually stick with classic red and green sanding sugar because it’s quick and really pops against the white coating, but I also love adding tiny edible pearls or mini holiday sprinkles to make the cake balls feel extra special. If you have peppermint extract on hand, a tiny brush-on of that before decorating can add a burst of seasonal flavor that your guests will notice.
Side Dishes
These cake balls pair wonderfully with warm drinks—a rich hot chocolate, peppermint mocha, or even a spiced cider all complement their sweetness beautifully. I like to set up a dessert station with these alongside some coffee and holiday cookies for a crowd-pleasing spread.
Creative Ways to Present
One of my favorite ways to present Little Debbie Christmas Tree Cake Balls Recipe is to stack them on tiered dessert trays shaped like a Christmas tree or arrange them in muffin liners inside a decorative holiday box. For parties, you might even place them on skewers for cake pop-style bites—just be sure to cover the sticks with matching colored ribbons!
Make Ahead and Storage
Storing Leftovers
I store any leftover Little Debbie Christmas Tree Cake Balls in an airtight container in the fridge. They stay fresh and delicious up to 5 days, which means you can prep them early without stress and pull them out exactly when guests arrive.
Freezing
If you want to freeze them, place the cake balls on a baking sheet until solid, then transfer to a zip-top freezer bag. They freeze well for up to 2 months. I’ve done this several times before big holiday events and they thaw perfectly without losing texture.
Reheating
These cake balls are best served chilled or at room temperature, so no reheating needed. If frozen, just take them out of the freezer and let them thaw in the fridge overnight. Giving them a little time to come to room temp before serving brings out the best flavor and texture.
FAQs
-
Can I use other Little Debbie flavors for the cake balls?
Absolutely! While the Christmas Tree Cakes offer a festive look and flavor, you can customize this recipe with other Little Debbie flavors like Zebra Cakes or even Swiss Roll for a delicious twist. Just keep in mind that flavors and textures vary, so you might want to adjust the cream cheese amount slightly to get the right consistency.
-
What’s the best way to melt candy melts to avoid clumping?
The microwave in short 20-30 second bursts is the safest bet. Stir well between each interval until smooth. Avoid overheating or adding water, as this can cause the melts to seize and clump. If they get too thick, a tiny bit of vegetable oil can help loosen them.
- How do I prevent the cake balls from falling apart while dipping?
Chilling is key! Make sure your cake balls are very firm before dipping. Also, work quickly when dipping so the balls don’t start to warm up. Using a fork or dipping tool and tapping off excess coating helps maintain their shape.
- Can I make the Little Debbie Christmas Tree Cake Balls Recipe ahead of time?
Yes! These cake balls keep really well in the fridge for several days and freeze nicely for longer storage. This makes them perfect for prepping ahead of busy holiday events or as gifts. Just store them in airtight containers to keep them fresh.
- Are there gluten-free alternatives for this recipe?
You can definitely adapt the recipe by using gluten-free vanilla cake crumbs instead of the Little Debbie cakes. Look for your favorite gluten-free store-bought cake or bake one from scratch. The rest of the ingredients are naturally gluten-free, but always check labels to be sure.
Final Thoughts
The Little Debbie Christmas Tree Cake Balls Recipe holds a special place in my holiday baking lineup because it’s so approachable yet festive. It’s the kind of treat I always look forward to sharing with friends and family, knowing it brings smiles and a little sparkle to any gathering. Give it a try—you’ll love how simple and satisfying these bites are, and they might just become your new holiday tradition too.
Print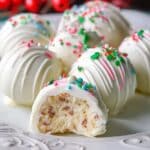
Little Debbie Christmas Tree Cake Balls Recipe
- Prep Time: 15 minutes
- Cook Time: 0 minutes
- Total Time: 45 minutes
- Yield: Approximately 40 cake balls 1x
- Category: Dessert
- Method: No-Cook
- Cuisine: American
Description
Delightfully festive and easy-to-make Little Debbie Cake Balls perfect for holiday celebrations. These bite-sized treats combine crumbled vanilla Christmas Tree Cakes with creamy cream cheese, coated in a smooth white candy melt shell, and decorated with red and green sanding sugar for a festive touch.
Ingredients
Base
- Two 5-count boxes vanilla Little Debbie Christmas Tree Cakes, crumbled
- 1 8-ounce package cream cheese, room temperature
Coating & Decoration
- 1 16-ounce package white candy melts
- ¼ cup red candy melts, melted (optional)
- Red and green colored sanding sugar
Instructions
- Prepare Cake Mixture: Begin by crumbling the two boxes of vanilla Little Debbie Christmas Tree Cakes into a large mixing bowl until fine crumbs form. Add the softened cream cheese and mix thoroughly until the mixture is uniform and can hold its shape when rolled.
- Shape Cake Balls: Using your hands or a small scoop, form the cake mixture into 1-inch balls, placing them on a parchment-lined baking sheet. Chill the balls in the refrigerator for at least 30 minutes to firm up.
- Melt Candy Coating: While the cake balls chill, melt the white candy melts in a microwave-safe bowl in 30-second intervals, stirring between each until smooth and fully melted.
- Coat Cake Balls: Remove the chilled cake balls from the refrigerator. Using a fork or dipping tool, dip each ball into the melted white candy until fully coated. Allow excess coating to drip off before placing the coated balls back onto the parchment paper.
- Decorate: While the coating is still wet, sprinkle red and green colored sanding sugar over the cake balls for a festive look. For additional decoration, drizzle melted red candy melts over the balls using a fork or piping bag.
- Set and Serve: Allow the candy coating to set completely at room temperature, or speed up the process by placing the cake balls in the refrigerator for 10-15 minutes. Serve chilled or at room temperature. Store any leftovers in the refrigerator.
Notes
- Ensure the cream cheese is fully softened for easier mixing.
- Use parchment paper or a silicone mat to prevent sticking during coating and drying.
- Red candy melts drizzle is optional but adds a beautiful festive detail.
- Store cake balls in an airtight container in the refrigerator for up to 5 days.
- You can substitute the Christmas Tree Cakes with any similar flavored Little Debbie cakes for variation.
Keywords: Little Debbie Cake Balls, Christmas Cake Balls, Holiday Dessert, No Bake Cake Balls, Festive Treats