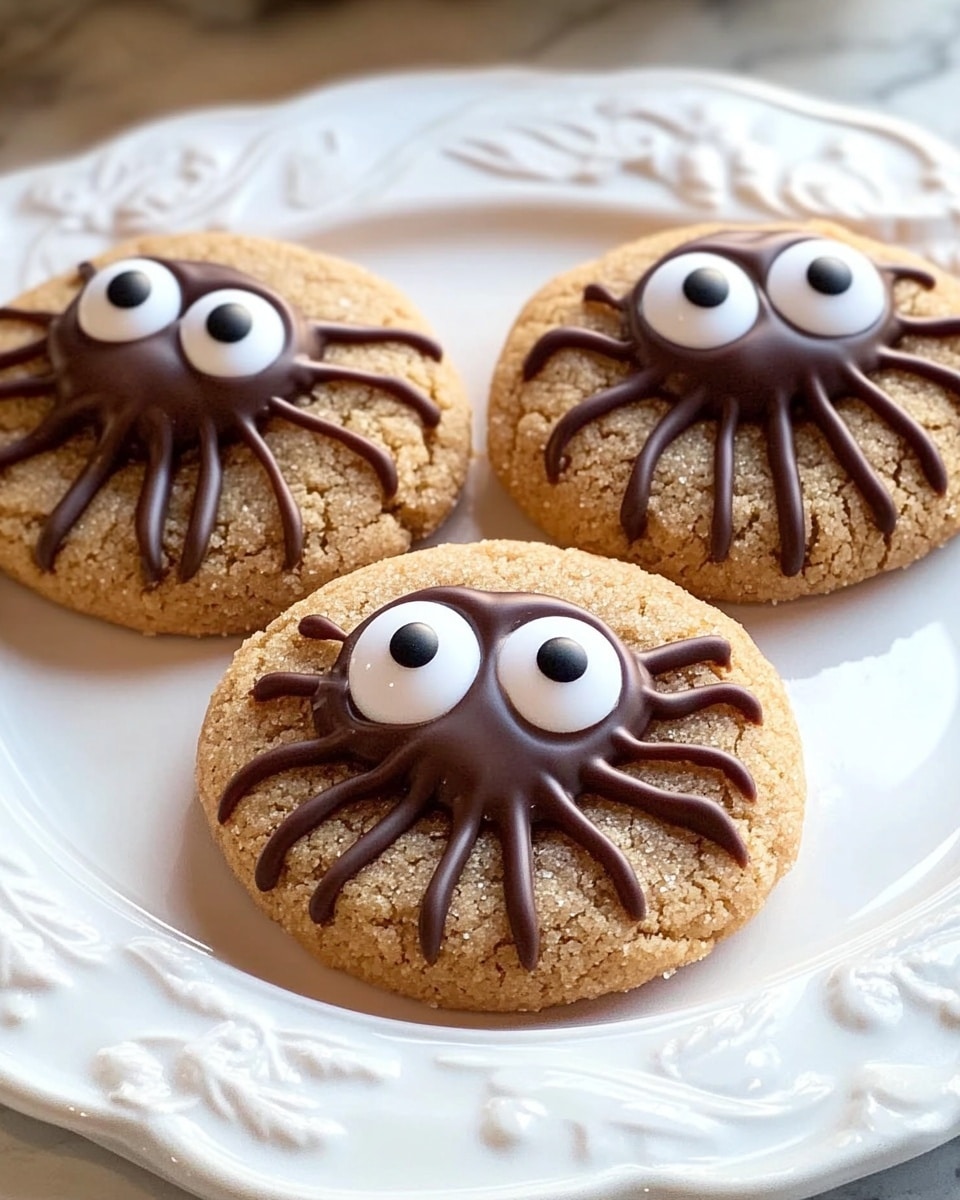
Peanut Butter Spider Cookies Recipe
Let me tell you, the Peanut Butter Spider Cookies Recipe is a quirky, fun twist on classic peanut butter cookies that you just have to try—especially if you have kids, or if you love festive treats that inspire a little creativity. These little spiders are not just adorable, but they pack that rich peanut butter punch combined with the gooey surprise of chocolate candies inside. Honestly, I’ve made these for Halloween parties and kids’ bake sales, and they’ve always been the highlight of the dessert table.
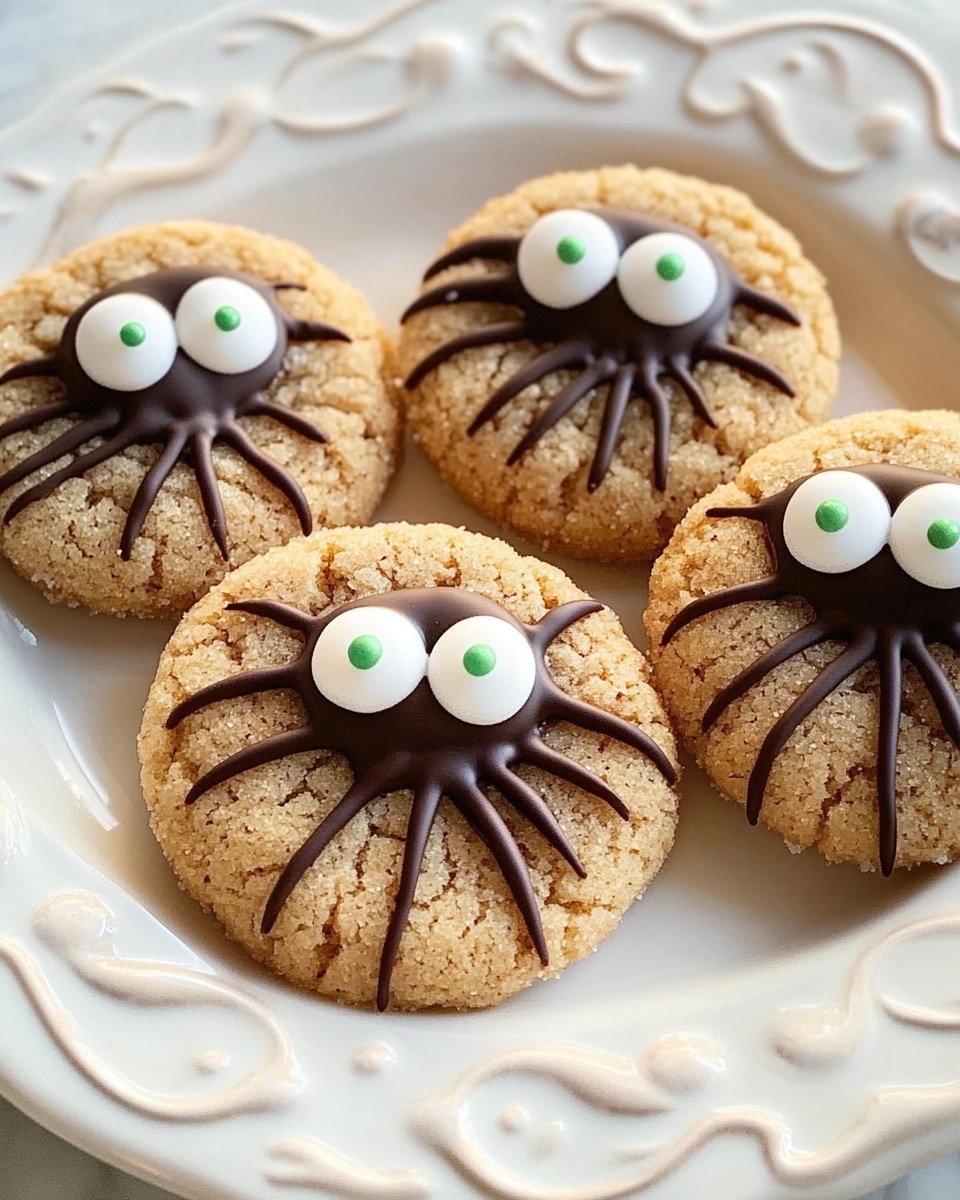
Besides their festive charm, these cookies hold up really well for making ahead, sharing, or even gifting. I love that their crunchy legs (made with frosting and candy eyeballs eye-poppingly cute) add a playful element while the cookie itself stays soft and tender. If you’re hunting for a peanut butter cookie with a delightful twist, this Peanut Butter Spider Cookies Recipe will be your new go-to.
Ingredients You’ll Need
Every ingredient here works together to create a perfectly balanced cookie—creamy, nutty, sweet, and just enough chocolatey goodness. Grab your pantry staples, but for best results, keep those chocolate candy spheres chilled; it really makes a difference in that melty center.
- Shortening: Gives the cookies a tender crumb and keeps them soft—don’t substitute with butter unless you want a different texture.
- Peanut butter: The star of the show, creamy or chunky works but I prefer creamy for that smooth binding.
- Brown sugar: Adds moisture and a slight caramel note that complements the peanut butter beautifully.
- White sugar: Provides the classic cookie crunch and sweetness.
- Egg: Helps bind the dough and adds richness.
- Milk: Boosts moisture to keep the cookie from drying out.
- Vanilla extract: A splash to balance flavors and elevate the aroma.
- All-purpose flour: The foundation—measuring accurately here makes a big difference.
- Baking soda: Leavens the cookies just enough for a nice rise without losing shape.
- Salt: Tightens flavor and balances sweetness.
- White sugar (for rolling): This coating adds a little sparkle and a pleasant texture contrast.
- Chocolate candy spheres with smooth filling: I use Lindt Lindor Truffles chilled straight from the fridge—they melt delightfully inside.
- Decorative candy eyeballs: These little guys bring the spiders to life, and I find them easiest to stick with frosting.
- Prepared chocolate frosting: Acts as “glue” for the legs and eyes—it’s also a yummy bonus treat!
Variations
I like to mix things up now and then depending on the occasion or my pantry situation. Once, I swapped out the peanut butter for almond butter and was surprised at how well the flavor still worked—it felt a little more grown-up. Feel free to put your own spin on this Peanut Butter Spider Cookies Recipe.
- Variation: Use dark chocolate truffles instead of milk chocolate for a richer, slightly bittersweet surprise.
- Variation: For a gluten-free version, swap all-purpose flour for a 1-to-1 gluten-free baking blend—texture changes a bit but still delicious.
- Variation: Add chopped peanuts or chocolate chips directly to the dough for extra crunch and texture.
- Variation: Experiment with peanut butter powder and less shortening to cut calories while keeping flavor.
How to Make Peanut Butter Spider Cookies Recipe
Step 1: Cream Together the Base
Start by beating the shortening, peanut butter, brown sugar, and white sugar together until smooth and fluffy—this usually takes 2 to 3 minutes with a mixer. This step is crucial because it creates the soft texture that makes these cookies melt in your mouth. Once creamy, add the beaten egg, milk, and vanilla, and mix until everything is combined.
Step 2: Mix Dry Ingredients Separately
In another bowl, whisk together the flour, baking soda, and salt. It’s important to sift or at least mix well here so your cookies bake evenly without unexpected lumps. Slowly add these dry ingredients to the wet, folding them in gently until the dough forms but don’t overmix or your cookies could get tough.
Step 3: Shape and Fill Your Spider Cookies
Before shaping the dough, set your chocolate candy spheres in the fridge—cold spheres don’t melt too quickly when you pop them in the oven. Roll the dough into small balls about 1 ½ inches in diameter. Flatten each slightly, place a cold chocolate candy in the center, then fold the dough around it, rolling gently to seal. This little trick keeps the surprise chocolate center intact.
Step 4: Roll and Bake
Roll the sealed dough balls in the extra white sugar for a sparkly finish before placing them on a baking sheet lined with parchment paper. Bake at 350°F (175°C) for about 10 to 12 minutes. Keep an eye on them—the edges should be set, but you want them soft in the center. Overbaking means losing that tender, peanut buttery bite.
Step 5: Decorating Your Spooky Spiders
After baking, let the cookies cool completely. Use the chocolate frosting as “glue” to attach the candy eyeballs and create spider legs by piping thin lines or dabs extending out. It’s surprisingly fun to decorate, and I find my kids love helping with this step. Remember, these details make your Peanut Butter Spider Cookies Recipe irresistibly cute and festive.
How to Serve Peanut Butter Spider Cookies Recipe
Garnishes
I typically stick with the candy eyeballs and chocolate frosting since they’re simple yet effective. Sometimes I sprinkle just a pinch of edible glitter or crushed peanuts on the frosting for some extra texture and shimmer, which always gets compliments.
Side Dishes
These cookies pair wonderfully with a cold glass of milk or a warm cup of spiced chai tea—both contrast the richness without overpowering the peanut butter flavor. For parties, I like serving them alongside small bowls of fresh fruit or even popcorn to balance the indulgence.
Creative Ways to Present
For Halloween or themed events, try arranging your Peanut Butter Spider Cookies Recipe on a black platter with orange napkins underneath for a pop of color. You can even make a “spider web” using drizzled white chocolate around the platter—trust me, it’s a showstopper!
Make Ahead and Storage
Storing Leftovers
I keep leftover cookies in an airtight container at room temperature, layered between parchment or wax paper, and they usually stay fresh for up to 4 days. The chocolate candy keeps its gooey center surprisingly well, so no worries on sogginess if you eat within that timeframe.
Freezing
If you want to freeze these cookies, I recommend freezing them undecorated. Once the dough balls are shaped but before baking, arrange them on a tray and freeze until solid, then transfer to a freezer bag. When ready, bake straight from frozen, adding an extra minute or two to your baking time. After baking and cooling, decorate with frosting and eyes.
Reheating
To warm frozen or leftover cookies, pop them in a microwave for 10-15 seconds or a quick 3-minute broil at low temperature. This softens the cookie and revitalizes the chocolate center without drying them out. Just be careful not to overheat—they go from perfect to tough quickly.
FAQs
-
Can I use peanut butter cups instead of chocolate candy spheres?
Great question! You can use peanut butter cups, but they tend to be larger and might spread more during baking, which can make the cookie less uniform. The smooth chocolate candy spheres, like Lindt Lindor truffles, melt evenly and stay nicely enclosed in the dough, giving that perfect gooey center.
-
How do I prevent the peanut butter spider cookies from spreading too much?
Make sure to chill your dough balls at least 15 minutes before baking if you notice spreading issues. Also, avoid too much mixing once you combine the dry ingredients, as overworking the dough can cause excess spreading. Using the chocolate candy spheres cold helps the dough to hold shape around the filling.
-
What can I substitute for shortening in this recipe?
While shortening keeps the cookies tender and soft, you can substitute with an equal amount of unsalted butter for a richer flavor. Just keep in mind the texture may be a bit less tender and more cakey. I’ve tried both, and shortening definitely gives the more classic peanut butter cookie consistency.
-
Can I make these cookies vegan?
To make a vegan version, swap the egg for a flax egg or applesauce, use vegan peanut butter and shortening, and choose vegan-friendly chocolate candies. You may need to experiment a bit with moisture levels, but it’s definitely doable and still delicious!
-
How long do peanut butter spider cookies stay fresh?
Stored properly in an airtight container at room temperature, these cookies stay fresh for up to four days. After that, they may start to dry out, so freezing if you want to keep them longer is your best bet.
Final Thoughts
This Peanut Butter Spider Cookies Recipe reminds me of all the fun times baking with my kids, where the decorating part turns into little laughter-filled moments. It’s a recipe that’s just as much about the experience as the result, and you’ll love both. Give it a try—you might find these spider-shaped delights quickly become a sweet tradition in your kitchen, too!
Print
Peanut Butter Spider Cookies Recipe
- Prep Time: 15 minutes
- Cook Time: 10 minutes
- Total Time: 25 minutes
- Yield: 24 cookies 1x
- Category: Dessert
- Method: Baking
- Cuisine: American
Description
Peanut Butter Spider Cookies are a fun and festive treat perfect for Halloween or any spider-themed gathering. These soft and chewy peanut butter cookies are rolled in sugar, topped with chocolate truffle ‘spiders’, and decorated with candy eyeballs to create spooky, adorable spider faces. The combination of peanut butter and chocolate adds a rich flavor that is sure to delight both kids and adults.
Ingredients
Cookie Dough
- ½ cup shortening
- ½ cup peanut butter
- ½ cup packed brown sugar
- ½ cup white sugar
- 1 large egg, beaten
- 2 tablespoons milk
- 1 teaspoon vanilla extract
- 1 ¾ cups all-purpose flour
- 1 teaspoon baking soda
- ½ teaspoon salt
For Rolling and Decoration
- ¼ cup white sugar for rolling
- 24 chocolate candy spheres with smooth chocolate filling (such as Lindt Lindor Truffles), refrigerated until cold
- 48 decorative candy eyeballs
- ½ cup prepared chocolate frosting
Instructions
- Prepare the Dough: In a large bowl, cream together the shortening, peanut butter, brown sugar, and white sugar until light and fluffy. Beat in the egg, milk, and vanilla extract until well combined.
- Combine Dry Ingredients: In a separate bowl, whisk together the all-purpose flour, baking soda, and salt. Gradually add the dry ingredients to the creamed mixture and mix until a soft dough forms.
- Preheat Oven and Prepare Baking Sheets: Preheat your oven to 375°F (190°C). Line baking sheets with parchment paper or lightly grease them to prevent sticking.
- Form Cookie Dough Balls: Shape the dough into 1-inch balls. Roll each ball in the ¼ cup of white sugar to coat thoroughly. Place them on the prepared baking sheets about 2 inches apart.
- Bake the Cookies: Bake the cookies in the preheated oven for 8 to 10 minutes or until edges are lightly browned but centers remain soft. Remove from oven and let them cool on the baking sheet for 5 minutes.
- Add the Spider Body: While the cookies are still warm, gently press one refrigerated chocolate candy sphere (truffle) into the center of each cookie. This acts as the spider’s body.
- Apply Chocolate Frosting Legs: Using a piping bag or a small spoon, pipe or draw eight legs around the chocolate candy sphere with the prepared chocolate frosting to resemble spider legs.
- Attach Candy Eyeballs: Place two decorative candy eyeballs on the top front of each chocolate sphere to complete the spider’s face. Press gently to secure.
- Cool Completely: Allow the cookies to cool completely on wire racks so the frosting sets and the spiders hold their shape before serving.
Notes
- For best results, refrigerate the chocolate candy spheres before using to prevent melting during assembly.
- You can substitute shortening with unsalted butter if preferred; this will yield a slightly different texture.
- Use a small piping bag or a plastic sandwich bag with a tiny corner cut off to pipe chocolate frosting easily.
- These cookies can be stored in an airtight container at room temperature for up to 3 days.
- To make the cookies gluten-free, substitute the all-purpose flour with a gluten-free flour blend.
Keywords: peanut butter cookies, spider cookies, Halloween cookies, chocolate truffle cookies, festive cookies, peanut butter dessert